|
|
BRITISH AUTOMOTIVE |
|
www.mgbmga.com MGTD Articles |
Technical Information (MGB 13C)
Rear Telescopic Shock Absorber Kit (Tube Axles)
Last modified 01/16/06
Before ordering, please read the following information carefully.
Over the years British Automotive has made available a comprehensive and complete rear telescopic gas charged shock absorber kit for the MGB. This kit contains British Automotive’s specially manufactured KYB shock absorber with valving appropriate for the MGB models. As part of our inventory liquidation program, we are selling all remaining shock absorber kits (very limited quantity) at British Automotive’s incurred costs of $198.88. This price is for the entire package. Description of this kit plus installation instructions follow in the text below.
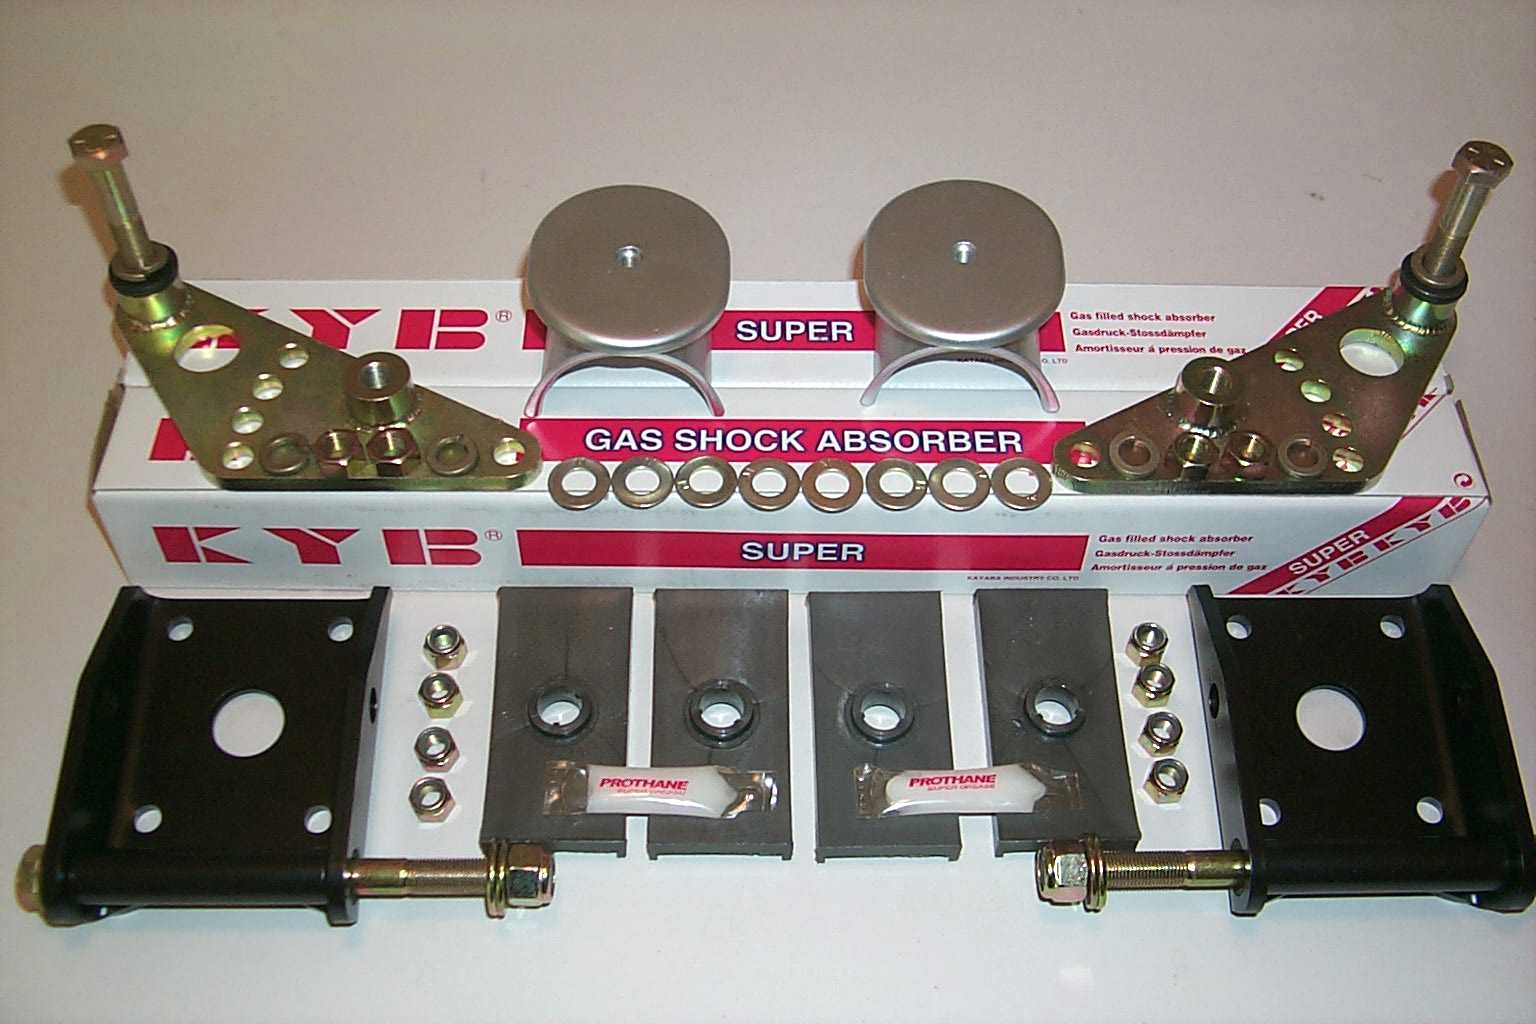
As you can see, this is a very comprehensive package. The kit contains British Automotive’s latest redesigned variable adjustment upper shock mounting bracket. By utilizing this bracket, ideal shock absorber installed height can be achieved.
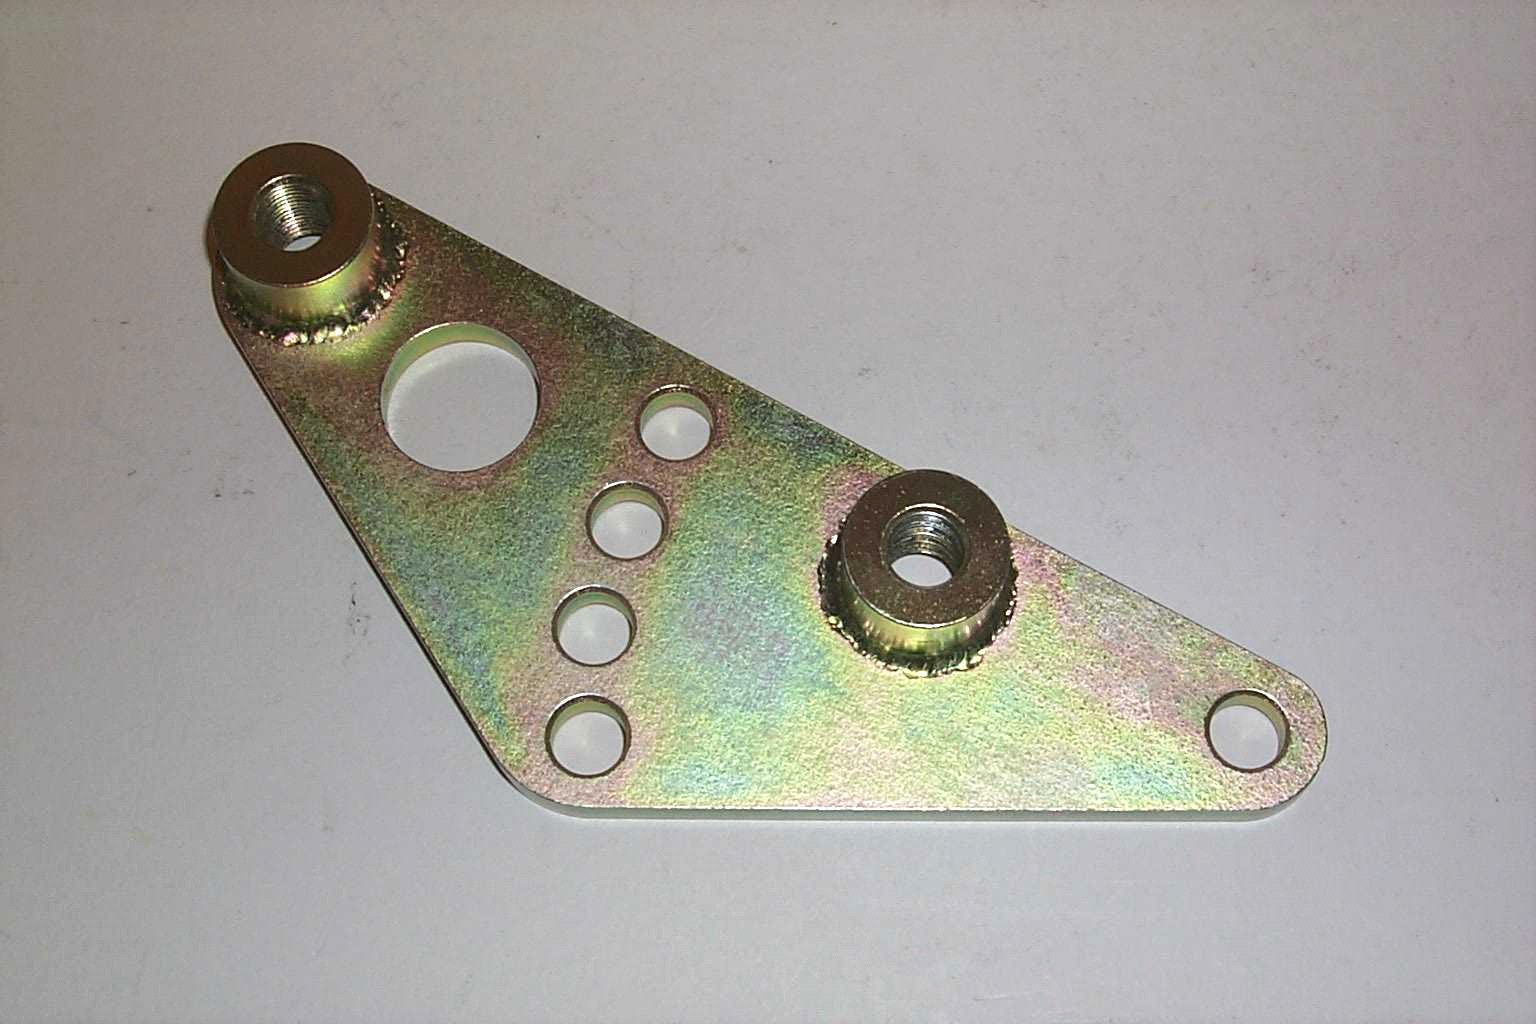
| LEFT-HAND BRACKET |
RIGHT-HAND RACKET |
 |
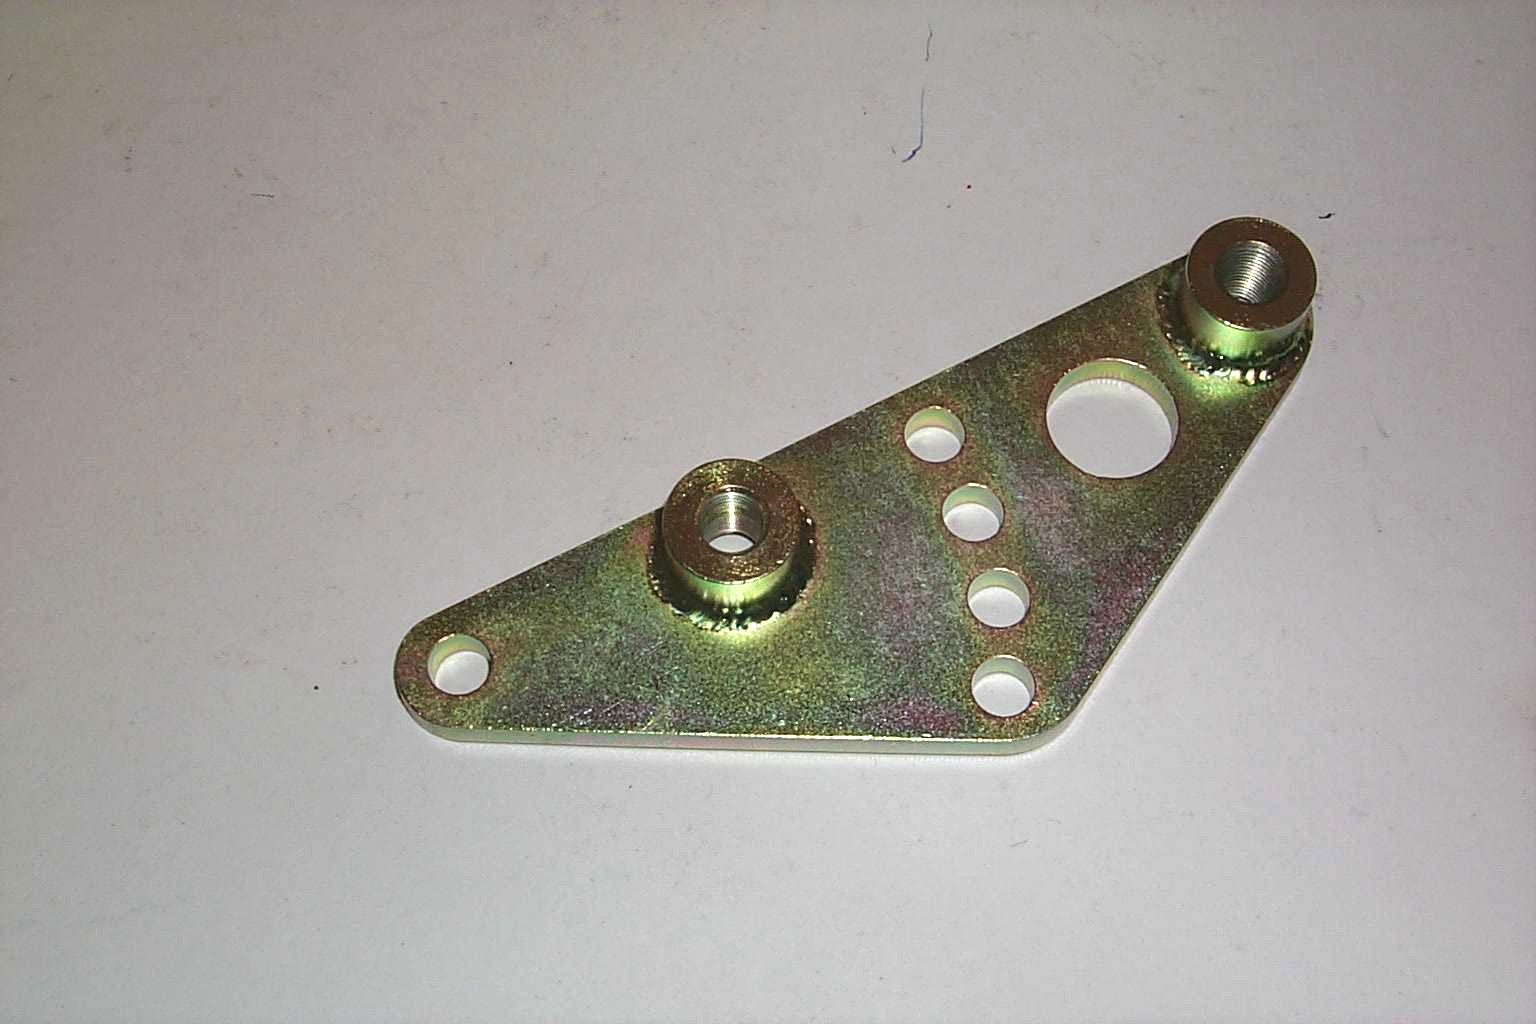 |
P0003027 | P0003071 |
This new mounting bracket now incorporates two shock absorber mounting positions utilizing 1/2" SAE x 2.5” grade 8 bolts. The upper threaded mounting boss is in the exact same location as its predecessor. The additional threaded mounting boss location duplicates what is commonly found on other mounting brackets. Along with these changes we have also increased the bracket plate thickness to 5/16”.
The efficiency of any telescopic shock absorber is relative to the installed angle of that particular shock absorber. Since, the shock absorbers will be installed at an angle; any upward movement of the rear axle assembly will produce further increases in this angle. This means that the shock absorber becomes less efficient as the angle increases.
Using the upper shock absorber mounting boss will result in installed shock absorber angles of between 5 to 8 degrees. The installer should be aware of rigid axle brake line to shock absorber body contact. If necessary, simply bend any offending brake line.
Using the lower shock absorber mounting boss will result in installed shock absorber angles of between 20 to 25 degrees.
The lower shock absorber mounting plates should be installed with the flanges facing down. When using this attachment point, in conjunction with the upper threaded mounting boss, the shock absorber installed height can be adjusted in approximately 1” increments. When using this attachment point, in conjunction with lower threaded mounting boss the installed shock absorber the installed height can be adjusted in approximately 3/8” increments
The following components can be found within SHOCK/KIT (also see image P0003006 above).
| Qty | Description | Part No. |
|---|---|---|
| 2 | LOWER SHOCK MOUNTING BRACKET | LOWER/BRKT |
| 2 | KYB SHOCK ABSORBER | VBPBA1 |
| 2 | LEFT & RITE UPPER MOUNTING BRACKET | S/ABS.BRKT |
| 2 | MODIFIED BUMP STOP PEDESTAL | PLATE/KIT |
| 2 | NYLATRON SPRING MOUNTING PAD (267-555) | ACG5002/A |
| 2 | “PROTHANE” LUBE | TEF/LUBE |
| 10 | 1/2" FLATWASHER | F436SZ12 |
| 2 | 1/2" LOCKWASHER | LW812 |
| 2 | 1/2" SAE NYLOK NUT | NLNZ81220 |
| 2 | 1/2” SAE x 6.5” BOLT | 8FZ1220612 |
| 2 | SPACER TUBE | TUBE.3.5” |
| 8 | 7/16” FLATWASHER | F436SZ716 |
| 4 | 7/16” LOCKWASHER | LW8716 |
| 4 | 7/16” SAE NUT | HNZ871620 |
| 8 | 3/8” SAE “U” BOLT NYLOK NUT | NLNZ83824 |
NOTE: All hardware is grade 8 and zinc (yellow) plated. Use your original 7/16” shock absorber mounting bolts (4).
Often overlooked is the importance of installing replacement telescopic shock absorbers correctly. The normal replacement shock absorbers that are available, such as KONI, SPAX, MONROE etc, have no internal bump stop protection. This is also true with British Automotive’s specially valved KYB shocks. All of the aforementioned shock absorbers have limited working stroke lengths of around 5.5” to 6”. This is due to the confines of the area in which they are fitted, along with maintaining adequate clearance between the lower shock absorber mounting and the road surface.
British Automotive’s KYB shock absorber dimensions are as follows:
| PART (VBPBA1) | DIMENSIONS |
|---|---|
| Compressed Length | 10.0" |
| Extended Length | 15-13/16" |
| Working Length | 5-13/16" |
| Installed Length | 13-1/2" * |
* NOTE: In our measurements, we have allowed 1/2" compression of the progressive bump stop rubber to prevent shock absorber damage from "bottoming out".
Subsequent to ordering your telescopic shock absorber kit (part no. SHOCK/KIT), we recommend measuring and recording the free distance between the rear axle bump stop pedestal and the progressive rubber bump stop. This measurement is designated A.
To avoid premature overload bump stop contact, and possible sudden “oversteer” problems, we recommend a measurement of no less than 2.5”. If measurement A is greater than 2.5”, you will need to reduce this distance accordingly.
Also, having an adequate amount of suspension bump travel is a precursor to achieving the correct telescopic shock absorber installed length dimensions.
There are two ways to accomplish the recommended distance:
- Install one or more of British Automotive’s stackable 1/2” spacer blocks. OR
- Install one or more of British Automotive’s bump stop pedestal 1/4” (actually 0.275”) spacers. These spacers attach directly to the modified bump stop pedestals that are included within the kit. You will need a 3/16” Allen wrench, not provided by us, to accomplish this.
If measurement A is less than 2.5” you will need to increase this distance accordingly.
Again, there are two ways to accomplish the recommended distance.
- Install British Automotive’s rear suspension adjustable ride height kit. (NOTE: we no longer supply the adjustable front spring mounting bracket for increasing the rear ride height.) OR
- Cut and trim the progressive bump stop rubber. However, I do not recommend this solution.
Measurement A should be carried out with the full vehicle weight concentrated over both front and rear axles with your MGB loaded as in normal road trim operation. However, this is not entirely practical. The alternative is to add weight to the drivers and passenger’s seats, as well as having a full tank of gas. In the absence of any human beings, two 80 lbs. bags of ready mix concrete on each seat should suffice.
I know this sounds amusing, however, when dealing with correct telescopic shock absorber installation issues, other manufacturers instructions are very vague indeed.
- Raise the vehicle and support the body just forward of the rear road spring front mounts.
- Remove the road wheels.
- Support the rear axle.
- Disconnect axle check straps from the axle mounting threaded pins. NOTE: Axle strap refitting will be dealt with later in the text.
- Remove, as a unit, the OEM lower shock absorber link mounting plate, shock absorber link & shock absorber assembly.
- Remove both bump stop pedestals and nylatron spring seating pads.
- Install modified bump stop pedestals and new nylatron spring seating pads. Be sure to apply “Prothane” to the nylatron pads. If you have decided to install 1/2” spacer lowering blocks, or 1/4” bump stop pedestal spacers, install them now.
- Install new lower shock absorber mounting brackets. Do not overtighten new nuts.
- Using the original upper shock absorber mounting bolts, with new flat washers, insert into body from the wheel well side.
- Using the lower of the 4 mounting adjustment holes fit the new upper shock absorber mounting brackets. There is no need to fit lockwashers at this stage.
- Install the telescopic shock absorbers. Raise rear axle if necessary. Do not overtighten hardware at this stage.
- Refit the road wheels.
- Lower the vehicle to the ground.
- Your MGB can now be moved to the appropriate location for final installation adjustments.
- Measure the shock absorber installed length. Do you need to adjust this length?
- If so, loosen and remove the rear upper mounting bracket bolt.
- Rotate downwards and align to the next hole. Make a note of this new length.
- Now measure the distance from the center of the lower shock absorber mounting bracket to the center of the upper shock absorber mounting bracket lower threaded boss. Would this be a more ideal shock absorber installed length?
- Pull down hard on the axle check strap, and then measure the distance from the center of the axle mounting pins to the center of the lower axle check strap eye. This measurement should be in the region of 3”. Since, the axle check straps have a certain amount of elasticity built into them; we are just concerned with really low measurements. If in doubt, simply remove them.
- Install lockwashers to the upper shock absorber mounting bracket and torque to 55 ft. lbs.
- Torque “U” bolt 3/8” SAE Nylok nuts to 10 ft. lbs.
- Be sure to that the left hand lower shock absorber mounting bolt is not contacting the exhaust system.
- All threaded hardware should be lube with 10W engine oil.
Your final adjustment is getting the shock absorber installed length correct. As indicated in the KYB dimensions, the installed length should be around 13.5”.
Obviously, you can see where we are going. Between these two mounting positions and the adjustment holes on the upper shock absorber mounting brackets, the MGB owner, with a little patience, should be able to achieve the approximate shock absorber installed length. In preference, I would shoot for 13.5” plus, rather than 13.5” minus.
Because it is of secondary importance, we have not discussed rear suspension rebound travel until now.
Under rebound conditions, the axle check straps usually dictate the amount of rear suspension travel available. However, it is quite possible that the extended shock absorber length is going to be the limiting factor. Since, telescopic shock absorbers have internal provisions for this; we do not particularly see this as a problem.
With the above in mind, we need to be sure that these axle check straps are not preventing the shock absorber from achieving their extended length (16”).
Below are images of the various components that are mentioned in this article.
| 1/4" | 1/2" | 3/4" | 1" |
 |
 |
 |
 |
P0002824 | P0002827 | P0002830 | P0002832 |
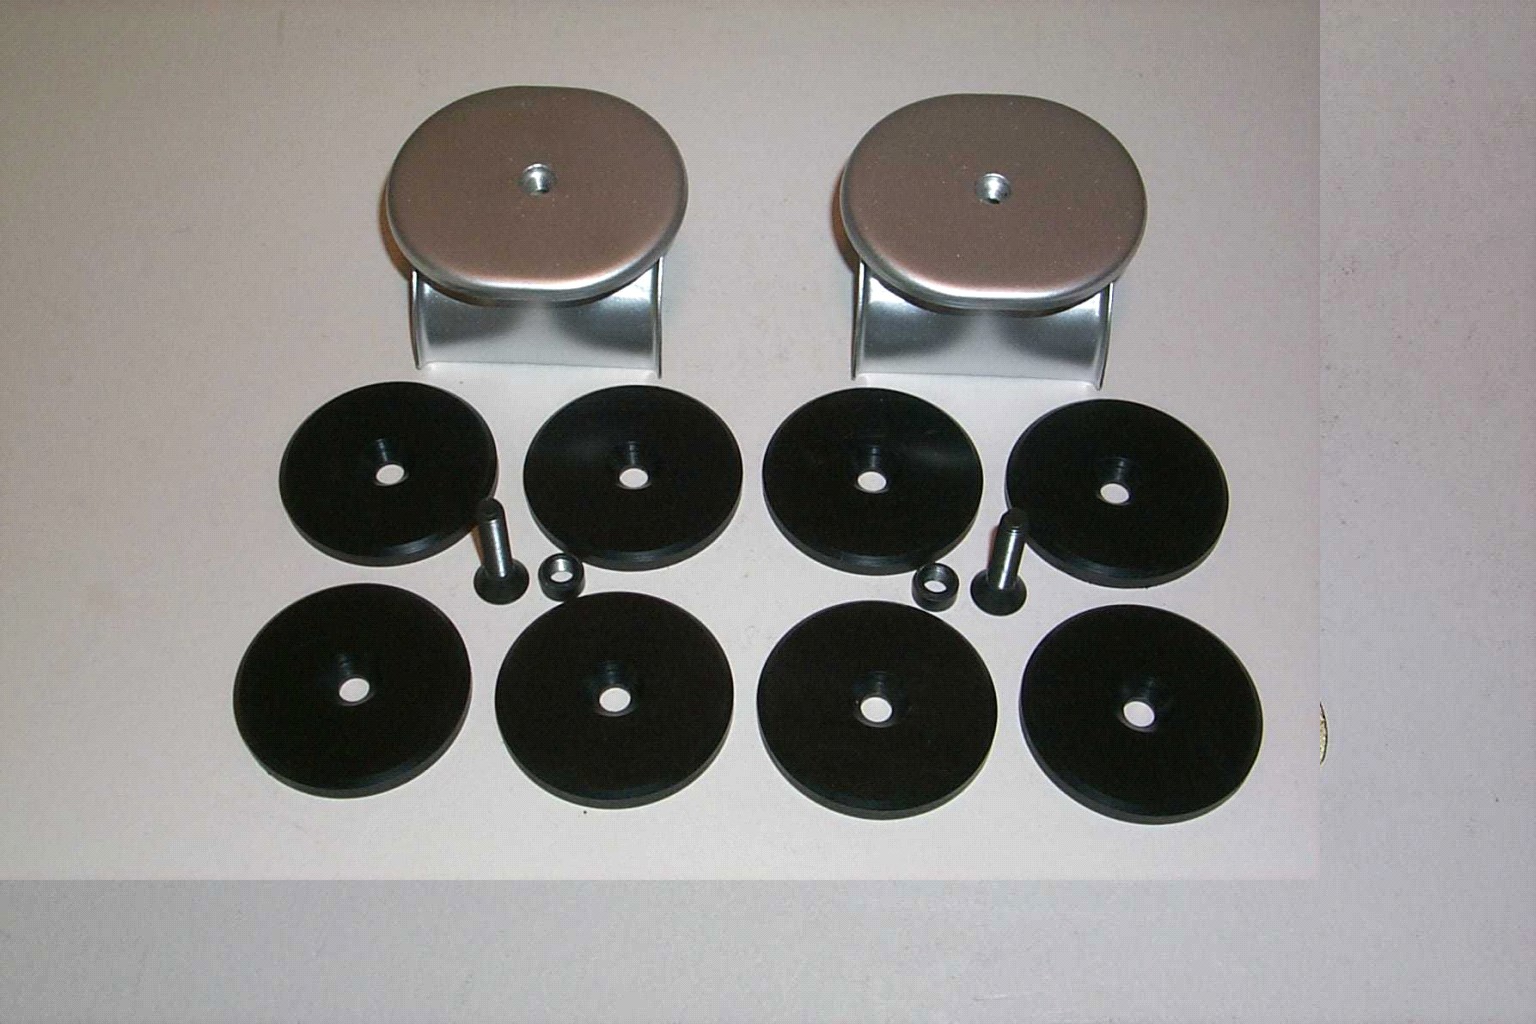
A maximum of 4 spacers (1/4”) can be used per modified bump stop pedestal. These spacers fit directly on top of the modified bump stop pedestals. All that is required is a 3/16” Allen wrench to tighten the securing screws.
NOTE: The modified bump stop pedestals are included in your shock absorber kit.
 |
 |
 |
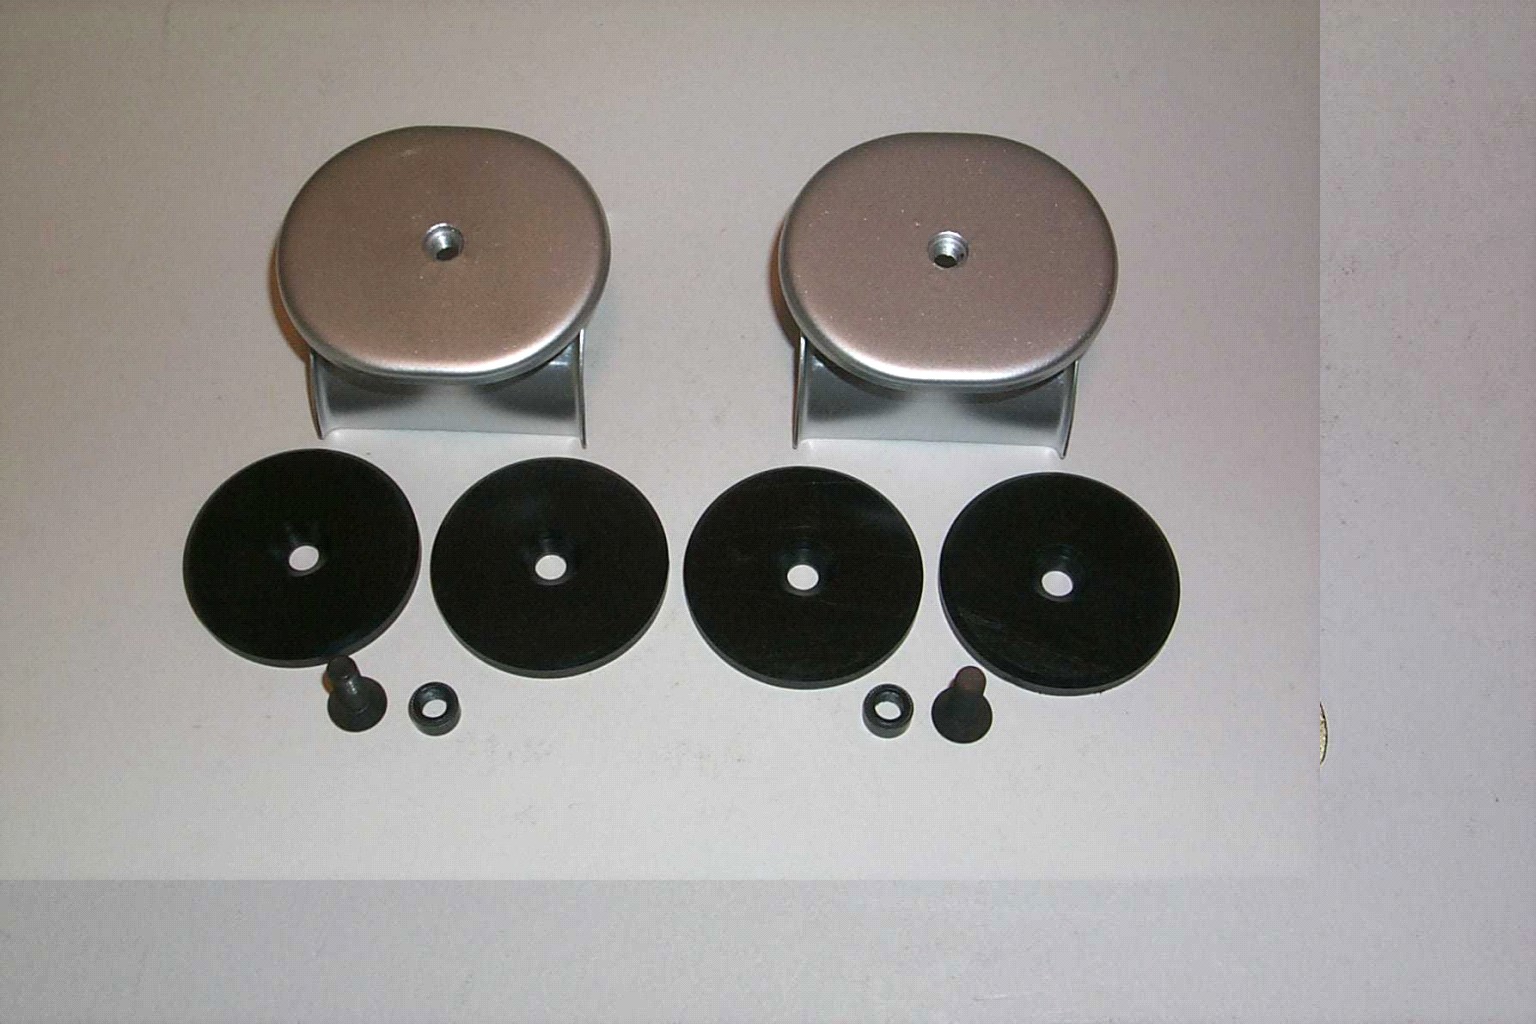
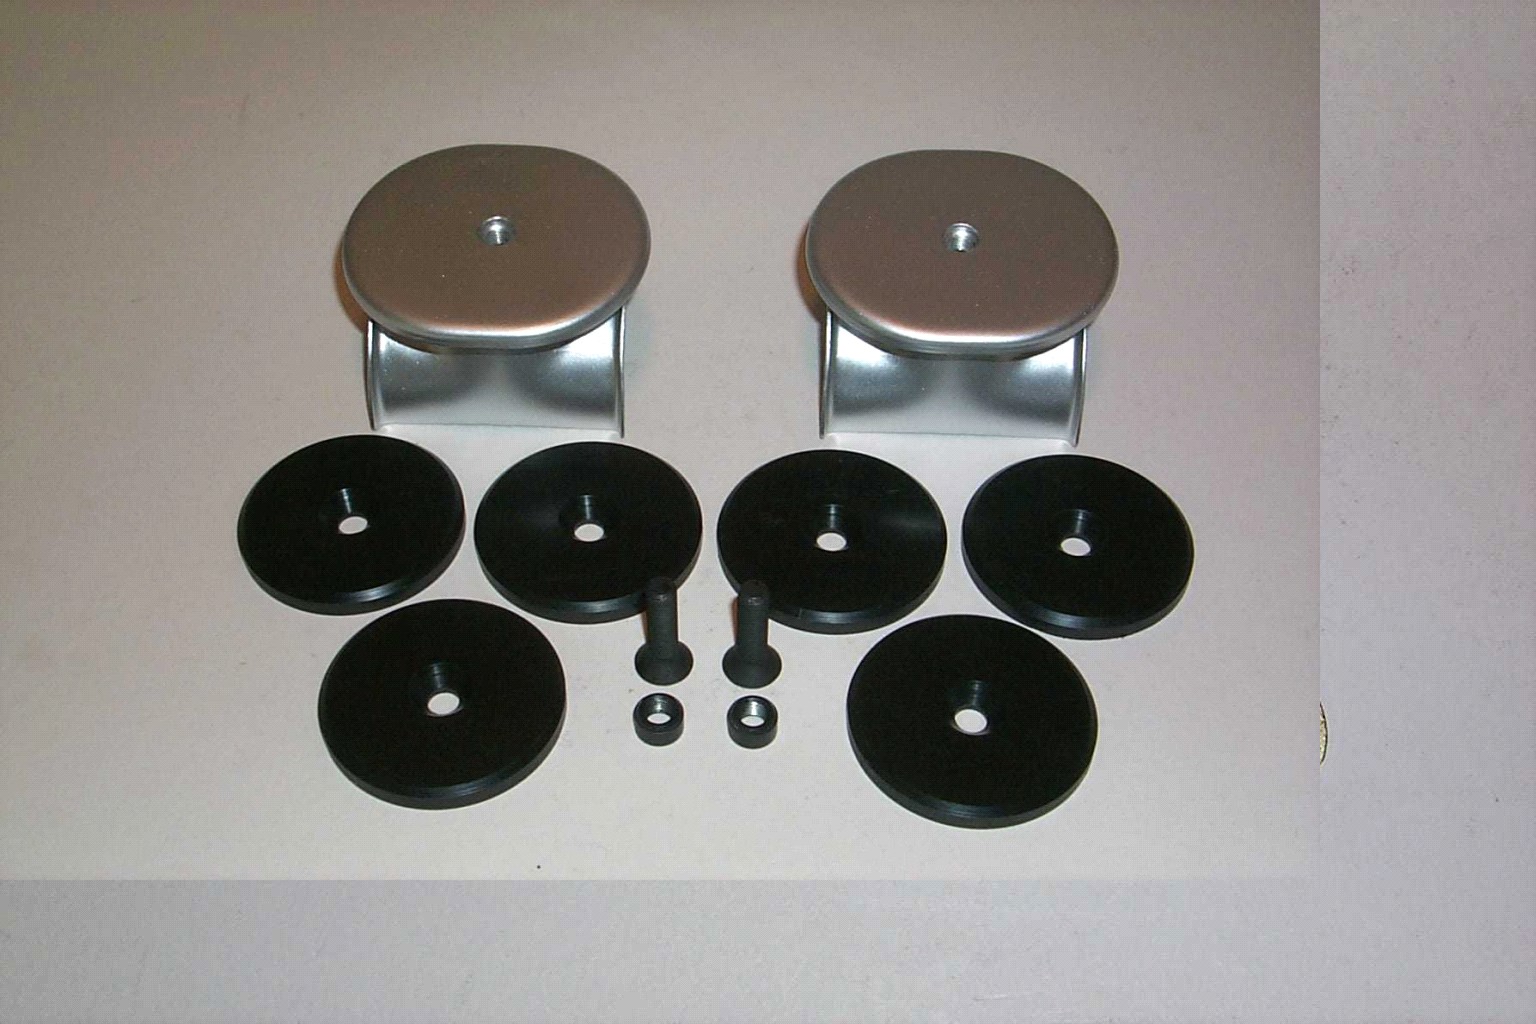
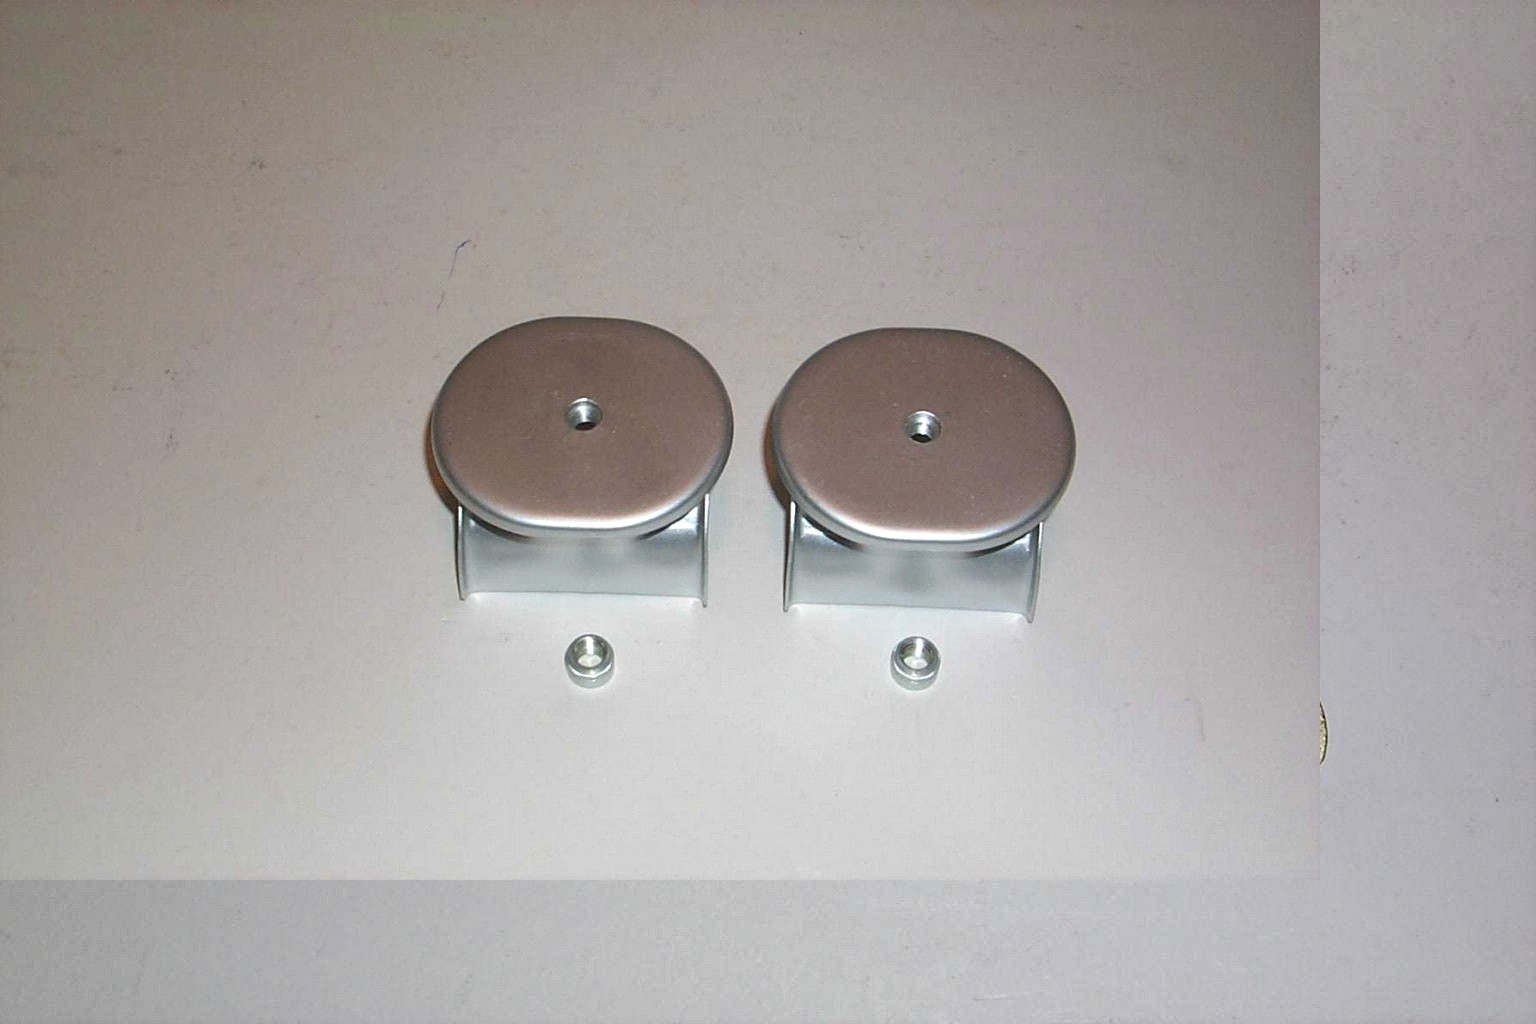
P0003081 | P0003083 | P0003085 |
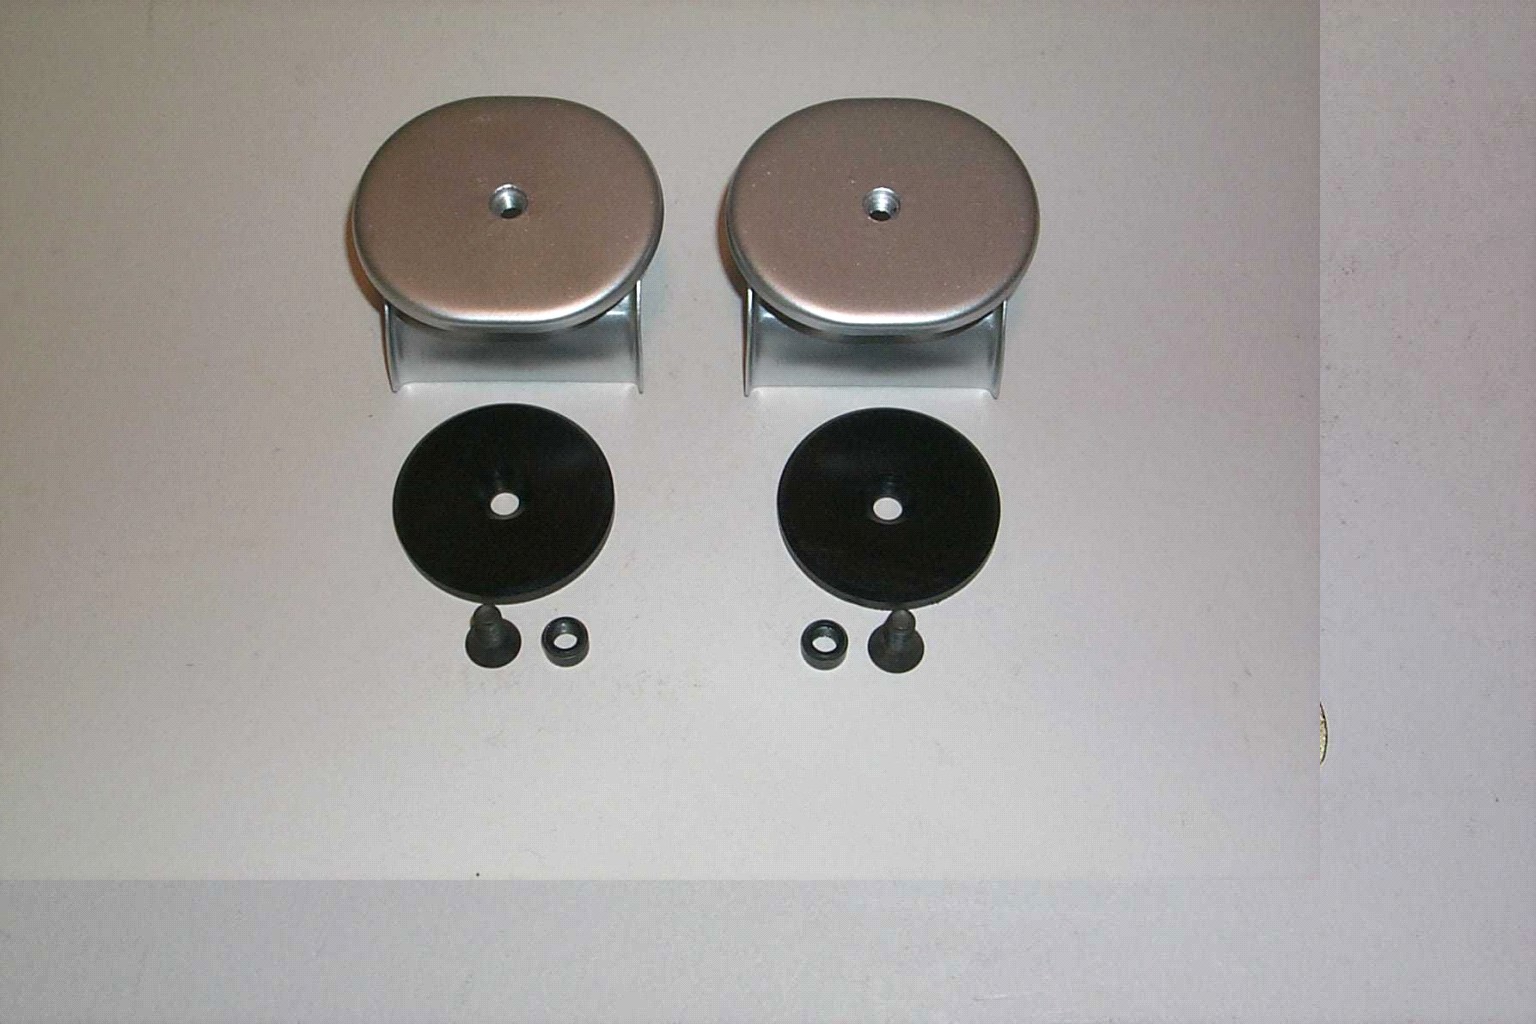
P0003081 as mentioned, these are provided with your shock absorber kit. The two small 5/16" SAE pem nuts are already installed in the bump stop pedestals.
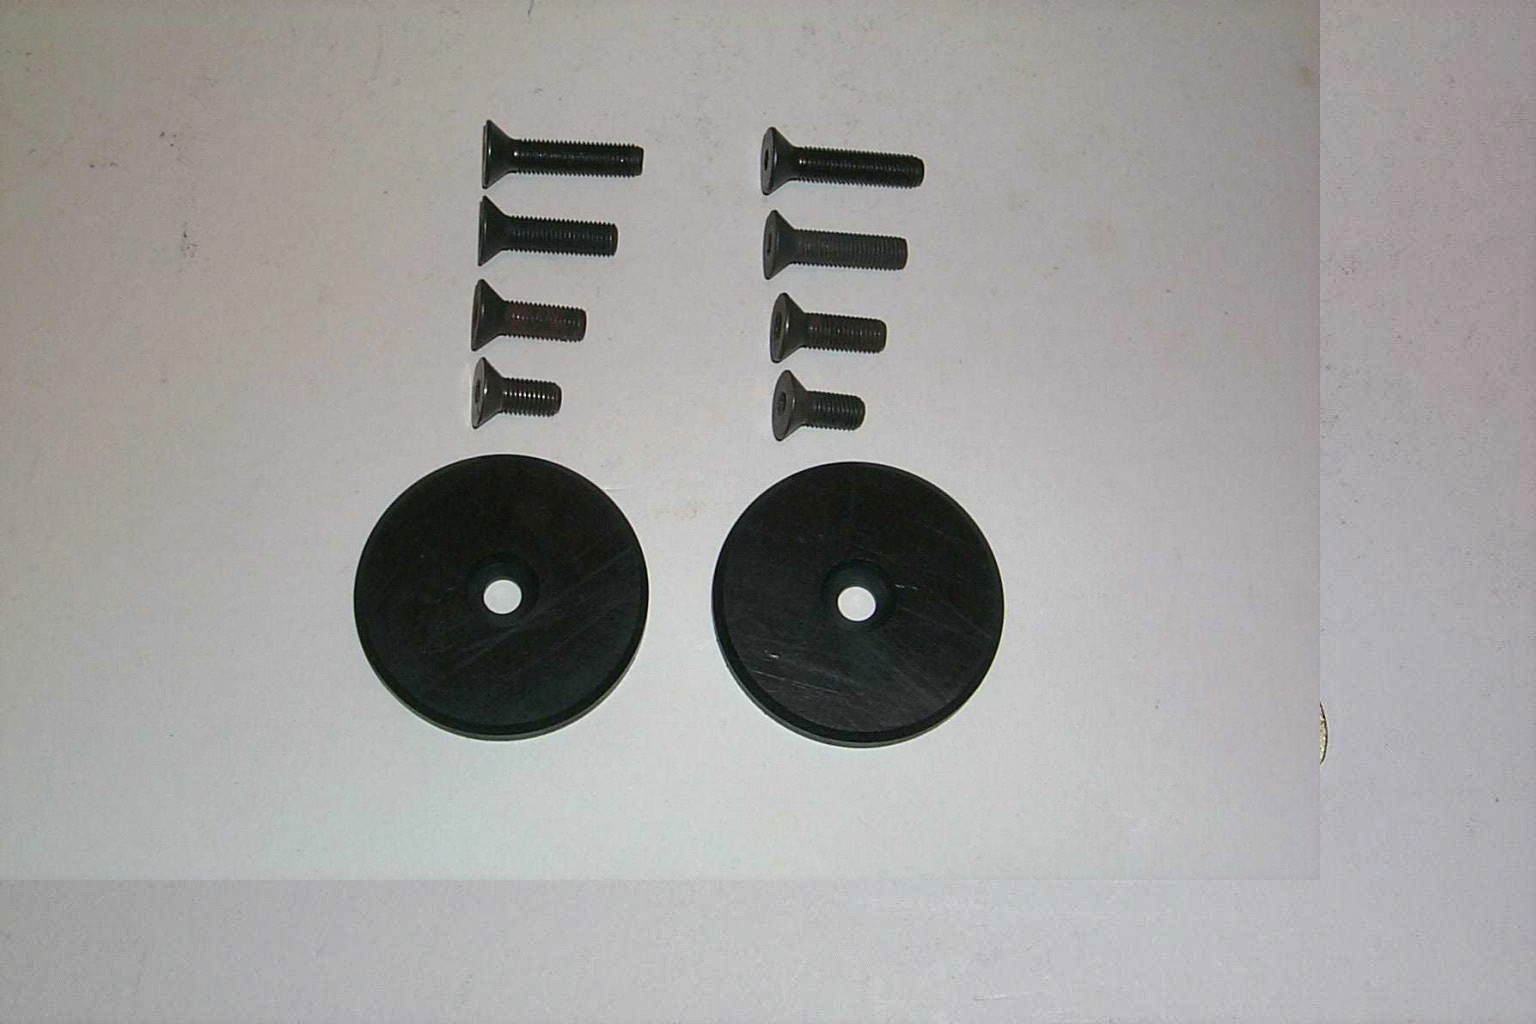
Image P0003083 shows the varying lengths of countersunk screws that are required when fitting one, or more, of the bump stop pedestals spacers. The Delrin spacers are shown for reference. One spacer with one screw etc. Part numbers and description are as follows:
| PART NO. | DESCRIPTION | COST EACH |
QUANTITY NEEDED |
|---|---|---|---|
| BUMP/SPACR | 1/4” Delrin Spacer | $5.38 | As required |
| FHS5162434 | 5/16” SAE x 1/4” Screw | 0.14 | 2 |
| FHS516241 | 5/16” SAE x 1” Screw | 0.16 | 2 |
| FHS5162414 | 5/16” SAE x 1-1/4” Screw | 0.18 | 2 |
| FHS5162412 | 5/16” SAE x 1.1/2” Screw | 0.21 | 2 |
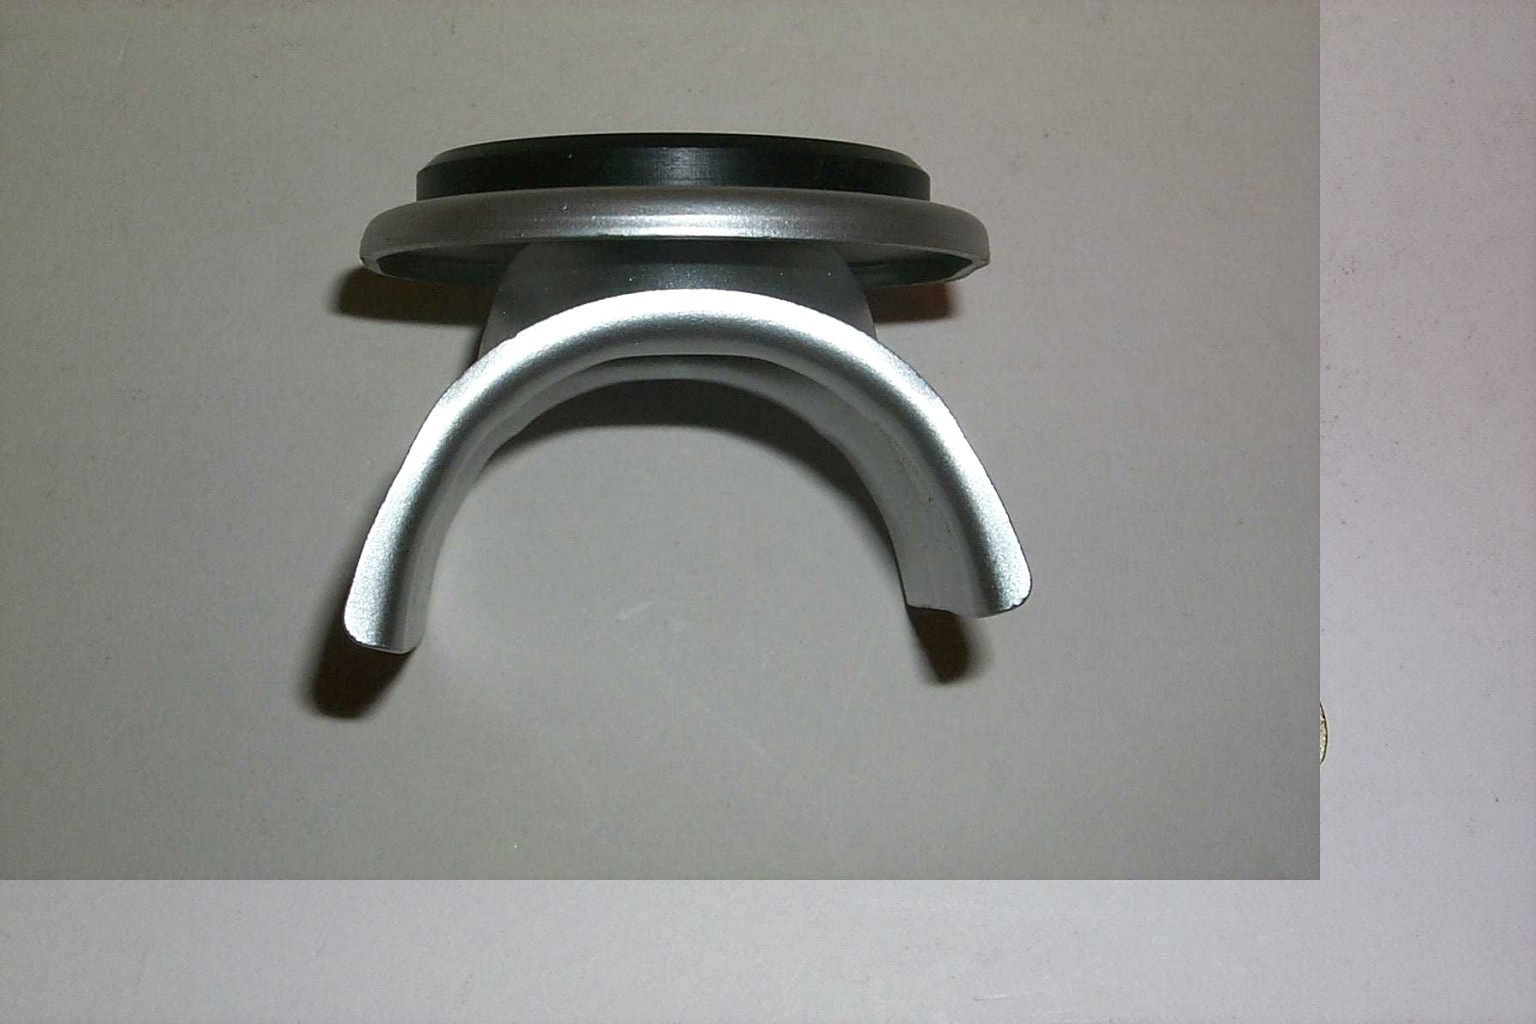
Image P0003085 actually shows a single bump stop pedestal spacer mounted on the modified bump stop pedestal.
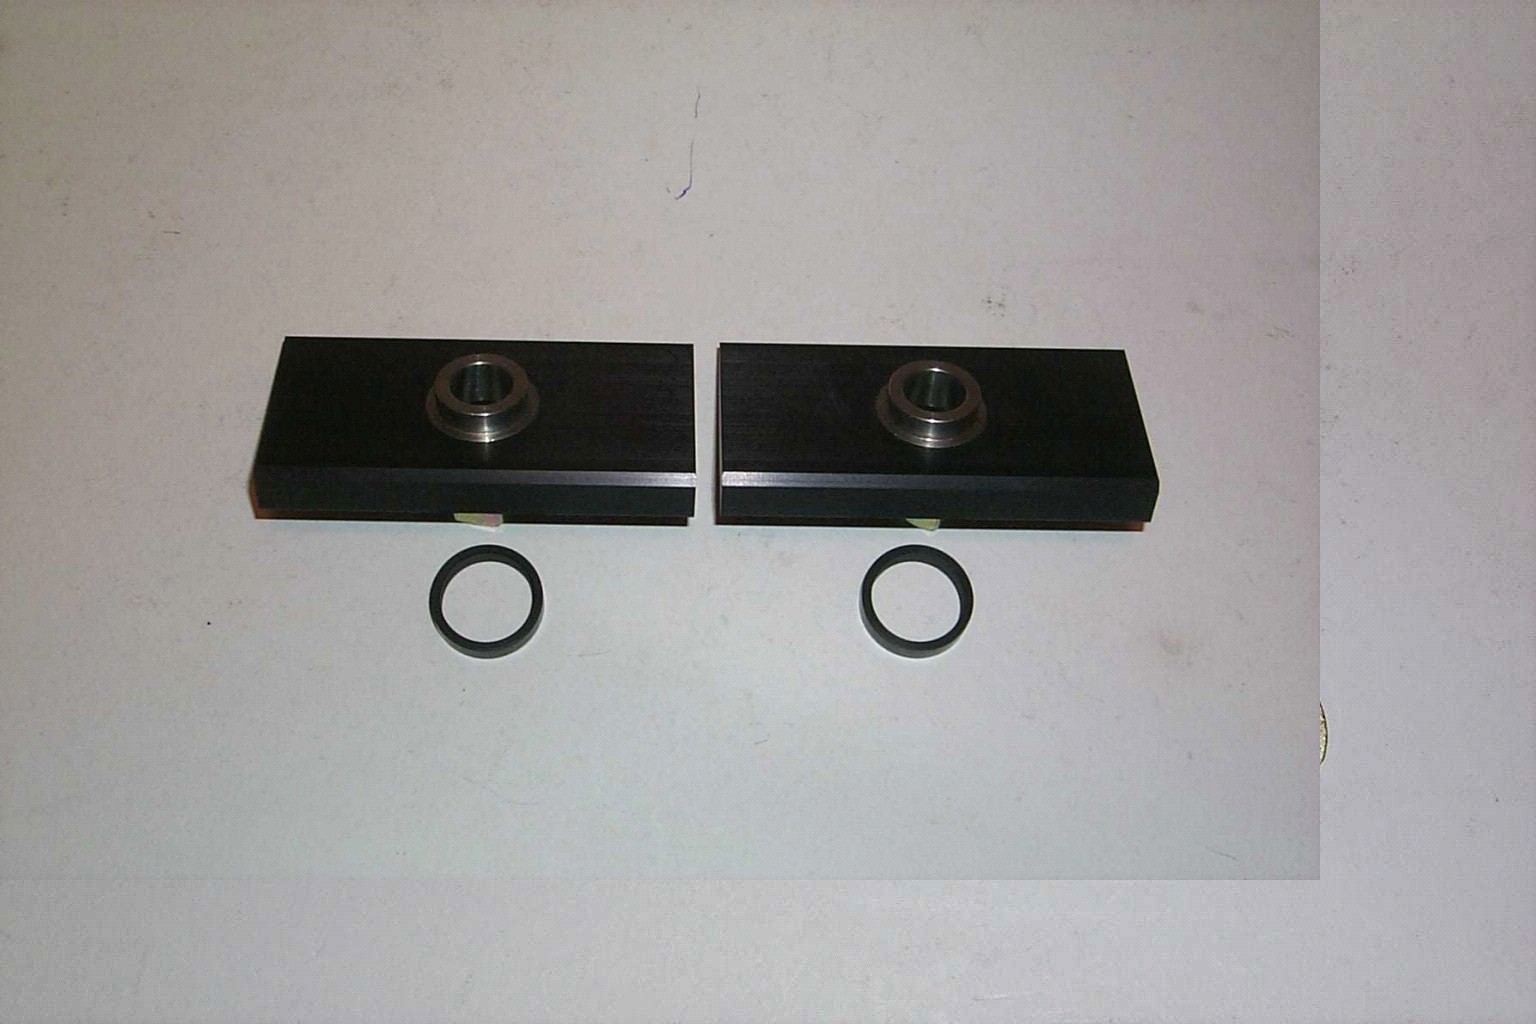
Image P0003087 shows the stackable 1/2” spacer blocks for lowering the rear suspension ride height. The Delrin o-rings also shown in this image are used for adapting the spacer block to the nylatron spring seating pad.
| PART NO. | DESCRIPTION | COST EACH |
QUANTITY NEEDED |
|---|---|---|---|
| SPCR/BLOCK | 1/2” Spacer Block | $8.40 | As required |
| PLSTC/RING | Delrin O-ring | 1.69 | As required |
I am sure that you already have the following in mind, however, I will throw them out there for your reference.