|
|
BRITISH AUTOMOTIVE |
|
www.mgbmga.com MGTD Articles |
Technical Information (MGA 11A)
MGA COIL-OVER SUSPENSION (PART 2)
Last Modified - 10/30/02
The following should be viewed in conjunction with technical article MGA11.
If you should to decide to go ahead and order the MGB coil-over suspension unit for your MGA, you will need to understand how British Automotive markets this kit.
Your complete MGA coil-over suspension kit will be supplied in two seperate kits as follows:
- Basic MGB coil-over suspension kit as supplied by the manufacturer.
- British Automotive’s upgraded MGA supplemental kit containing all relative hardware along with polyurethane bushings etc.
The combination of these two kits is shown.in image 1 (ONE SIDE ONLY)
SEE IMAGE 1
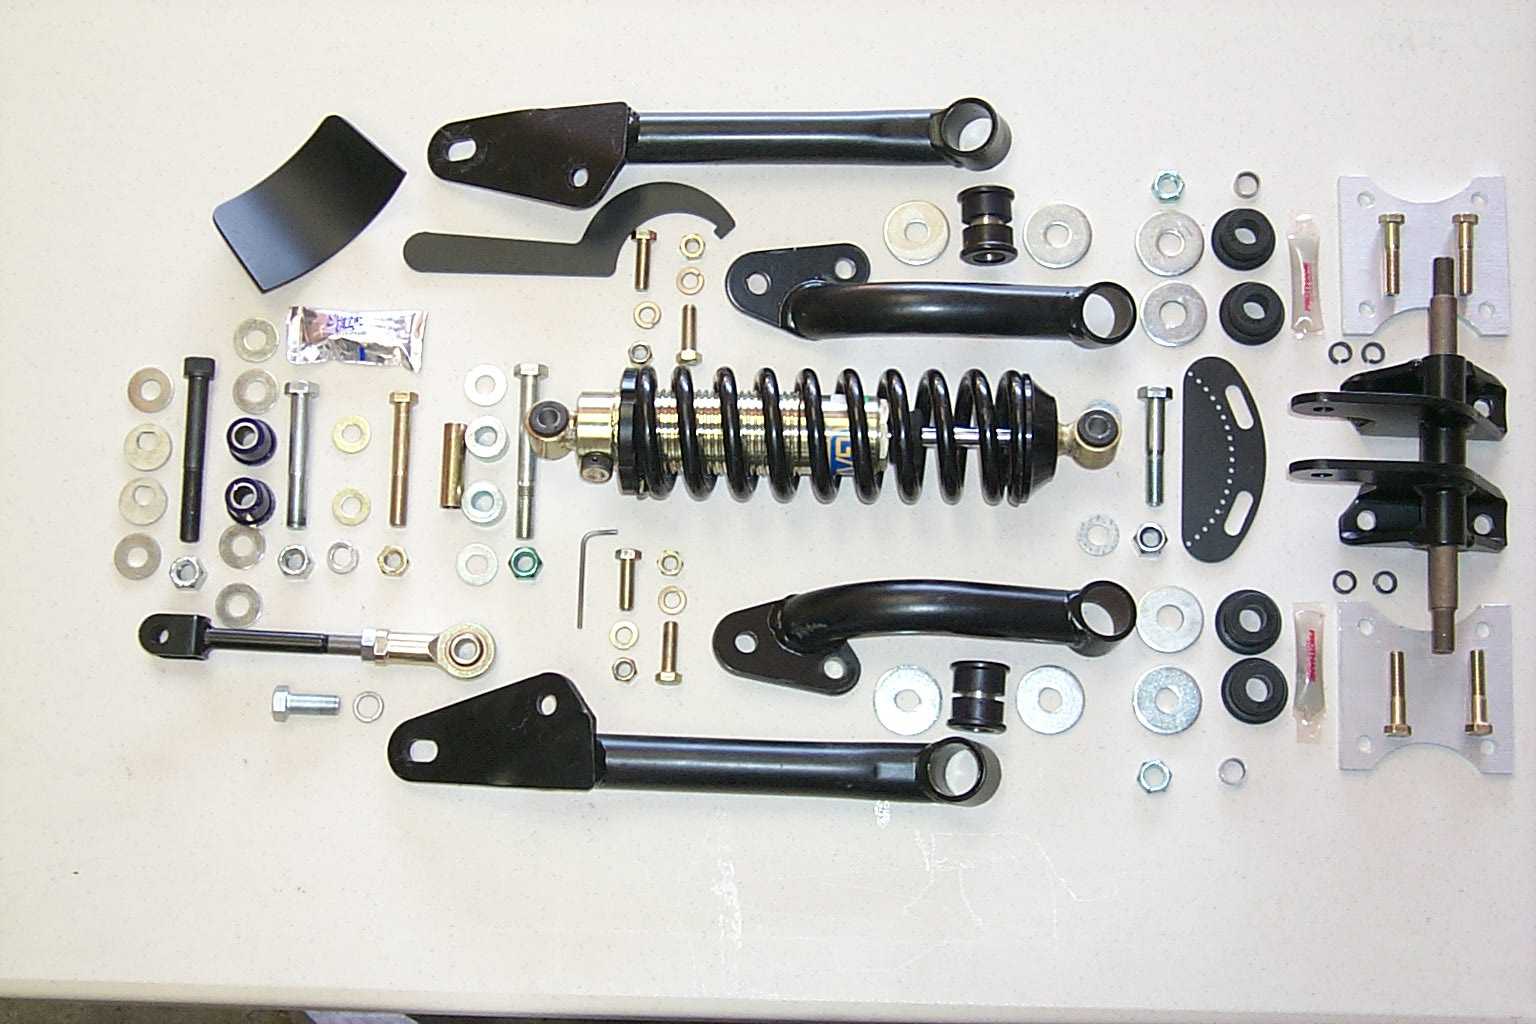
IMAGE 1 P0002358
With the aid of further images we will try to simplify how this kit is assembled, using both the manufacturer’s basic kit, and British Automotives’s supplemental kit. This information is in addition to what you will receive within the manufacturers basic kit.
The manufacturers original supplied upper mounting bracket. (Shown in image 2).
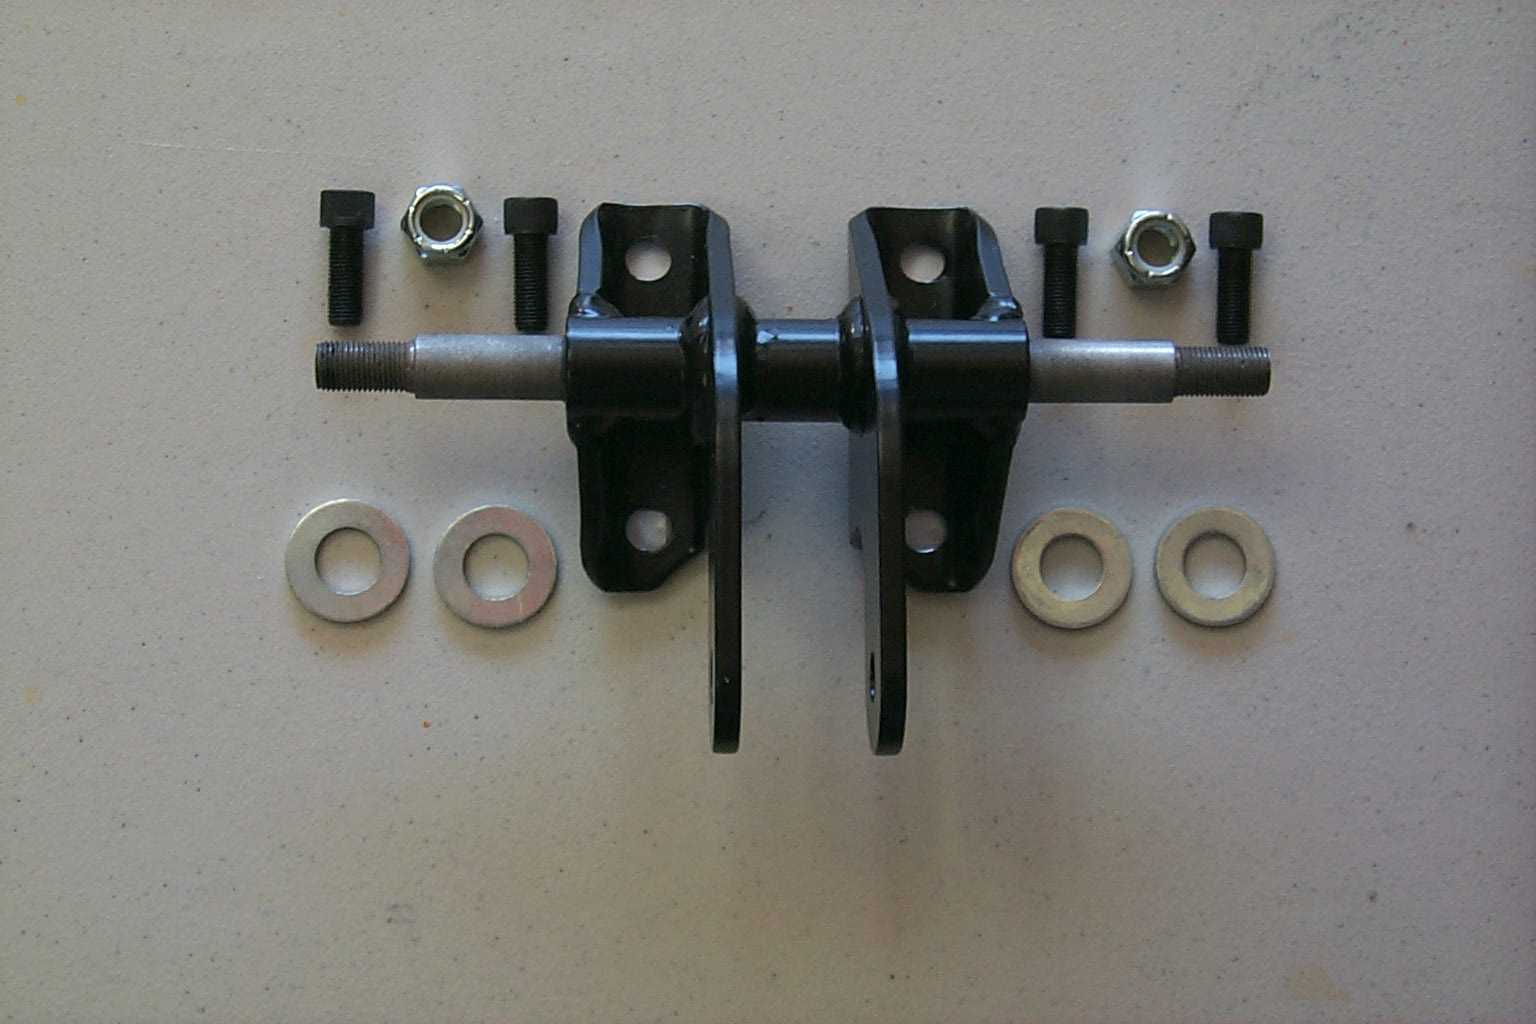
IMAGE 2 P0002365
British Automotive’s upgraded upper mounting kit. (Shown in image 3). You can see we have significantly expanded the components.
The kit comprises of the following:
Modified Upper Mounting Bracket (2)
Spacer. ¼" (4)
USS Bolts 3/8’ x 1.3/4" (8) NOTE: The use of a thin walled 3/8" socket is required.
Hi-Collar lockwasher 3/8" (8)
Large Inner Washer .625" ID (4)
Polyurethane Bushing (8)
Teflon Lube (4)
Spacer Tube .300" (4)
Large Outer Washer .500" ID (4)
Thin Shoulder ½" SAE Locknut (4)
Simply disgard the following components. (Shown in image 2).
Allen Headed Socket Cap Screw (8)
Washer (8)
Locknut ½" (4)
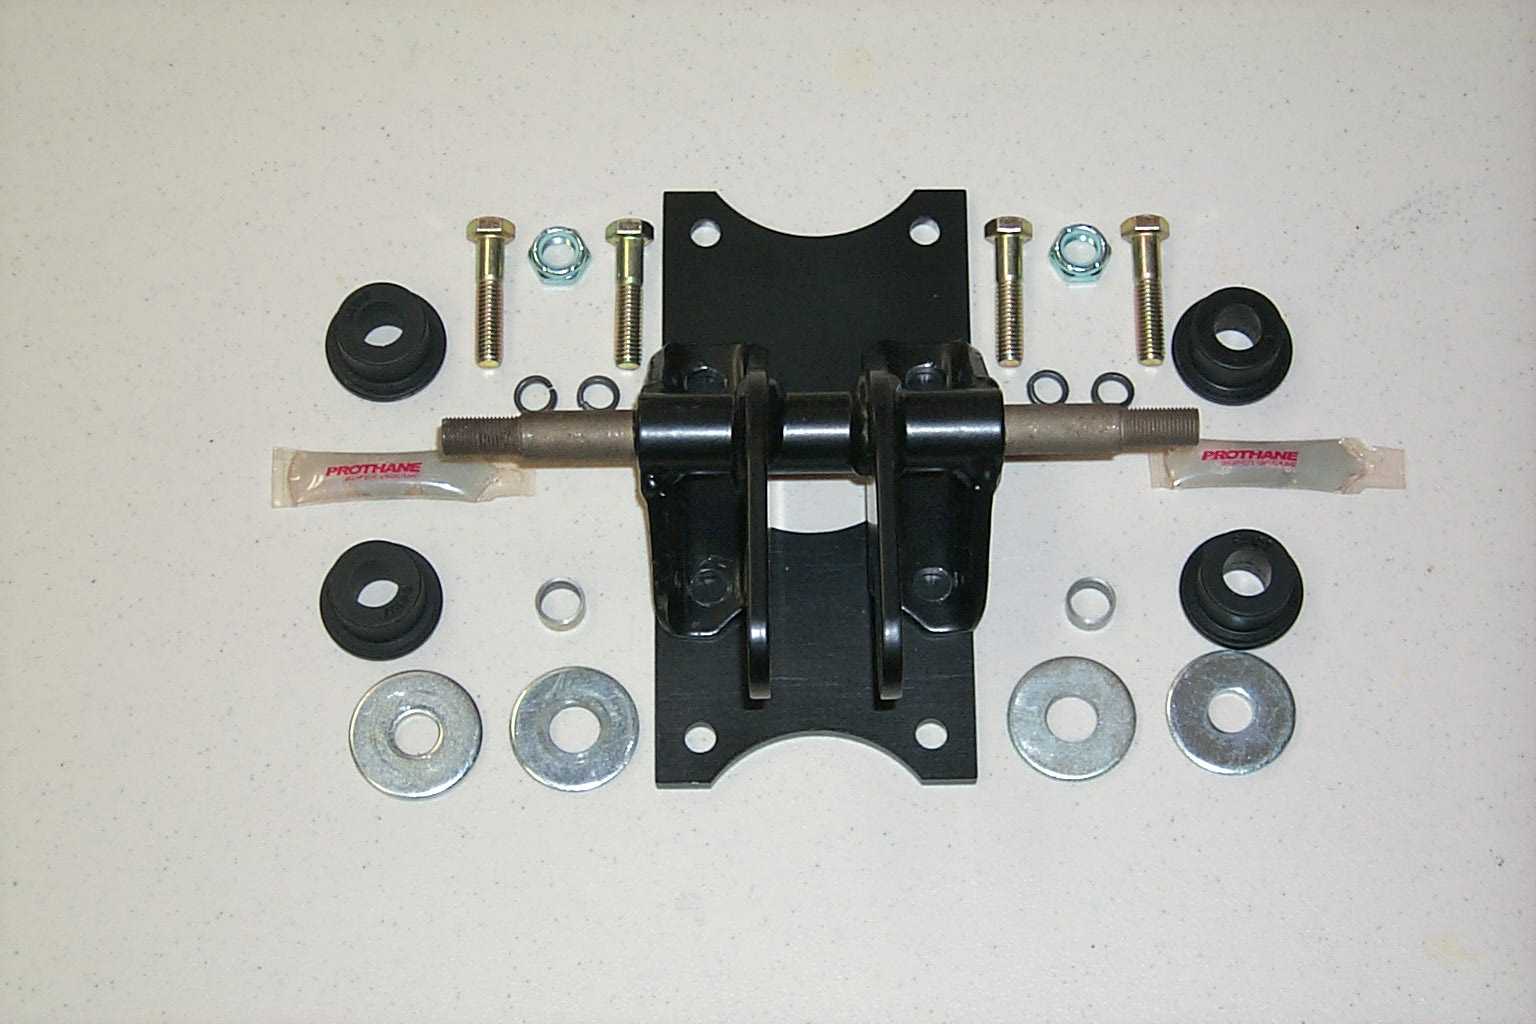
IMAGE 3 P0002383
If you intend converting your MGA 1500 OEM drum brakes to MGB disc brakes, British Automotive will supply you with the additional components. (Shown in image 4).
Superflex Upper Trunnion Bushes (4).
Retain the upper trunnion bolts (2), nuts (2) and castor adjusting shims (8) found in original manufacturer kit.
.
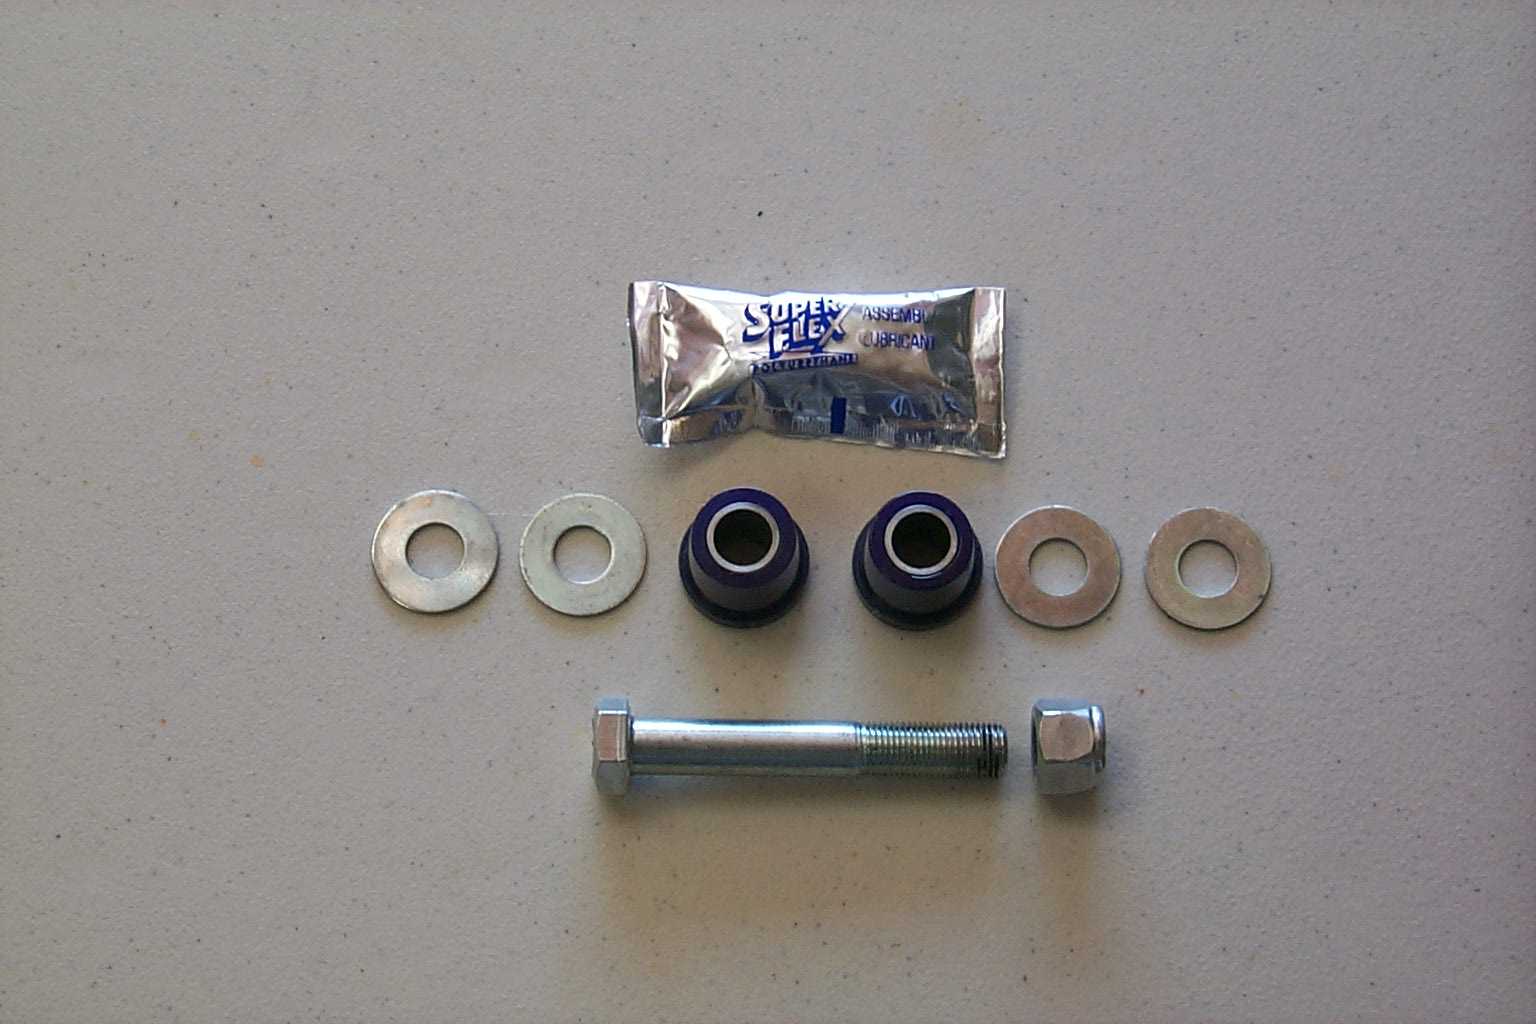
IMAGE 4 P0002378
MGA 1600/1622 owners who are installing the coil-over suspension to the OEM disc brake set up, we bring you the following information.
We have already outlined in MGA11 the need to machine the upper link and distance tube assemblies. Here we are going to explain how we arrive at the necessary dimensions.
Install the coil over suspension upper mounting bracket along with the upper arm asemblies. Special attention should be made when installing the polyurethane bushings. Since, we want to promote the bushings to rotate on the upper mounting support pin, and not within the arm itself, it is important that the bushings be inserted into the upper arms dry. Apply supplied lubricant to the bush thrust face and the bush inner ID only.
Disgard the original upper arm spacer, and substitute with 2.025" spacer found in British Automotive’s supplemental kit. (Shown in image 5). Use manufacturer supplied spacer hardware. Tighten the upper arms and spacer bolt assembly.
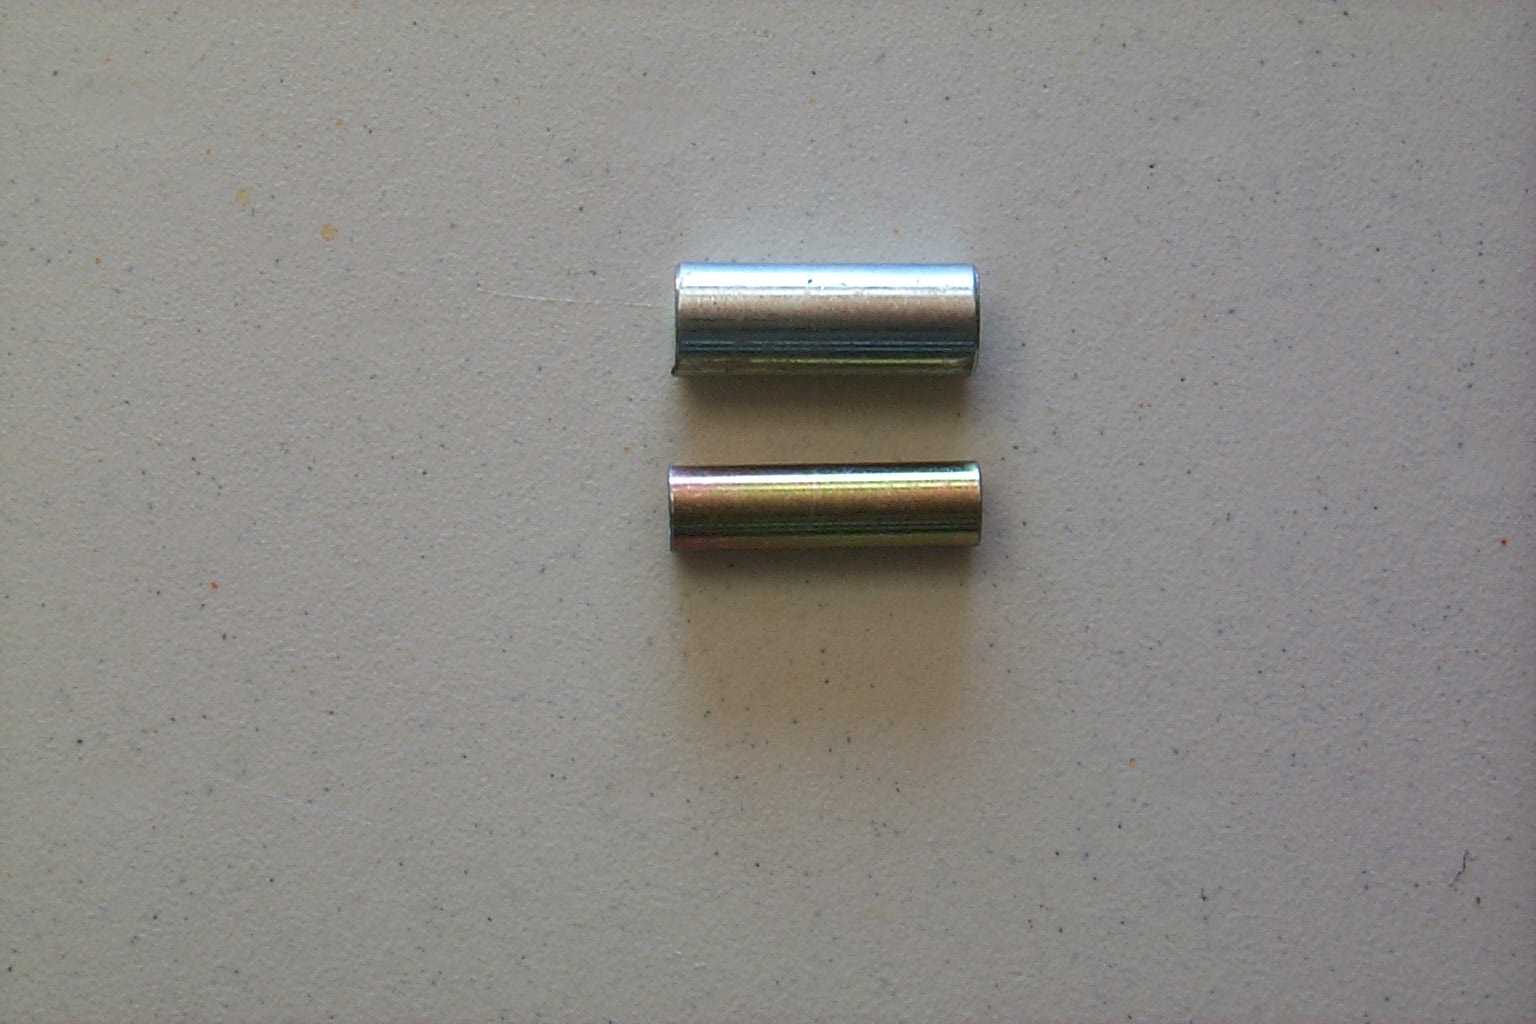
IMAGE 5 P0002373
1. Using a dial caliper measure the inside distance between the upper arms at the location of the upper link bolt holes. Average several readings and record.
Before continuing, we suggest that you have the MGA factory workshop manual AKD 600D, or a reproduction, such as Moss Motors 210-410 on hand. However, for those MGA owners not possessing the necessary literature, the following should suffice.
Install a new upper link bush and hone to fit new distance tube. It is suggested that you use new hardened thrust washers (2) and new seal supports (2) for each side.
- Measure the total thickness of the aforementioned parts. Add to this the total
Thickness of the castor adjusting shims (4).
3. Subtract the total in 2 from that recorded in 1 above. Machine the new distance tube to this measurement.
According to the MGA factory workshop manual there should be between .008" and .013" end clearance between either upper link end faces and the hardened thrust washers.
I recommend going with the lower of the two numbers.
4.Subtract .008" from the distance tube measurement found in 3 above. This will be your new upper link width.
The upper link must be machined an equal amount on both sides. A minimum land of .200" should be machined for seal support purposes. Also, the upper link integral rebound abutment should be removed. Both these items are shown in images 6A & 6B.
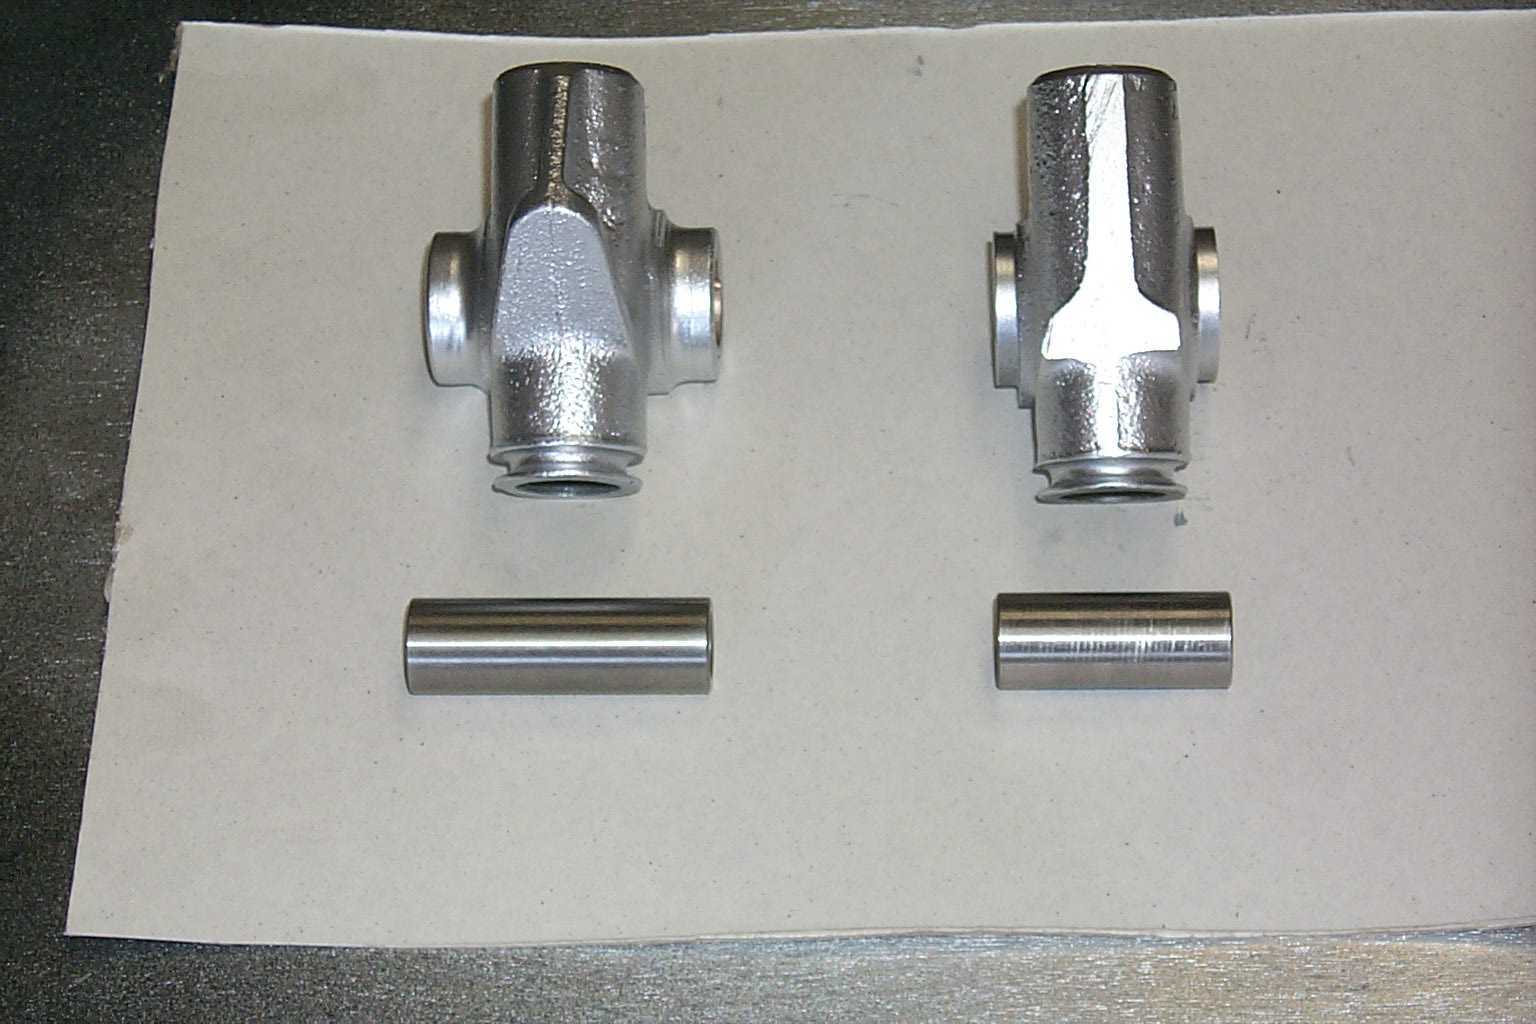
IMAGE 6A MGA TOP TRUNNION
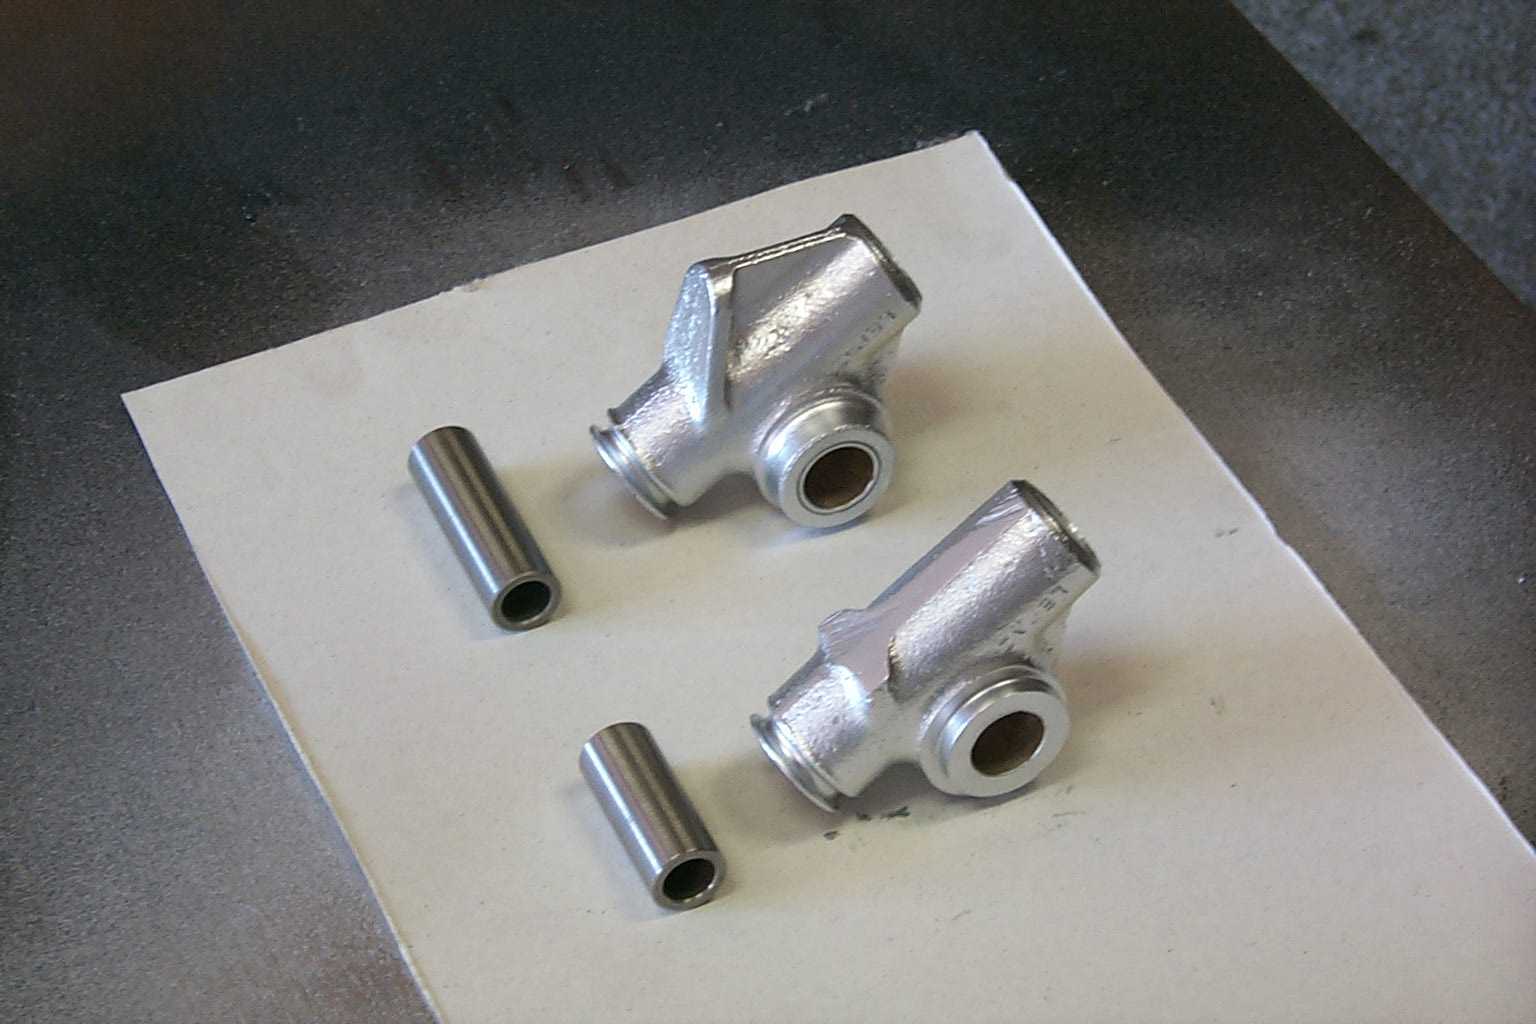
IMAGE 6B MGA TOP TRUNNION
Within British Automotive’s coil over supplemental kit we provide you with the following components. (Shown in image 7).
Superflex Bottom Arm Polyurethane Bushings with Tubes (8)
Superflex Polyurethane Bushing Lube (1)
Large Fulcrum Arm Washers (4)
3/8" x 1.25" SAE Grade 8 Bolts (8)
3/8" Lockwashers (8)
3/8" SAE Nut (4)
3/8" SAE Nylok Nut (4)
NOTE: Since we want to promote the polyurethane bushings to rotate around the bushing tube, and not in the bottom arm, it is important that the bushings are assembled into the arms dry. Apply supplied lubricant to the bush thrust face and bush inner ID only.
Please retain your original fulcrum arm castle nuts (4).
IMAGE 7 P0002377
Unlike the manufaturers kit, British Automotive supplies you with the following components. (Shown in image 8).
Lower Spring Collar Adjusting Tool (1)
Location Template (1)
3mm Allen Key (1)
Position template on the outer shock absorber mounting studs and tighten nuts. Using a 1/8" drill bit, drill through the series of holes, all the way through the member material. Remove template and drill out 1/8" holes with ¼" drill bit.
Make 2 vertical hacksaw cuts through the member, intersecting at the outer 2 holes.
Grind away excess member material to accommodate strengthener plate. (Shown in image 1).
Strengthener plate can now be welded into position.
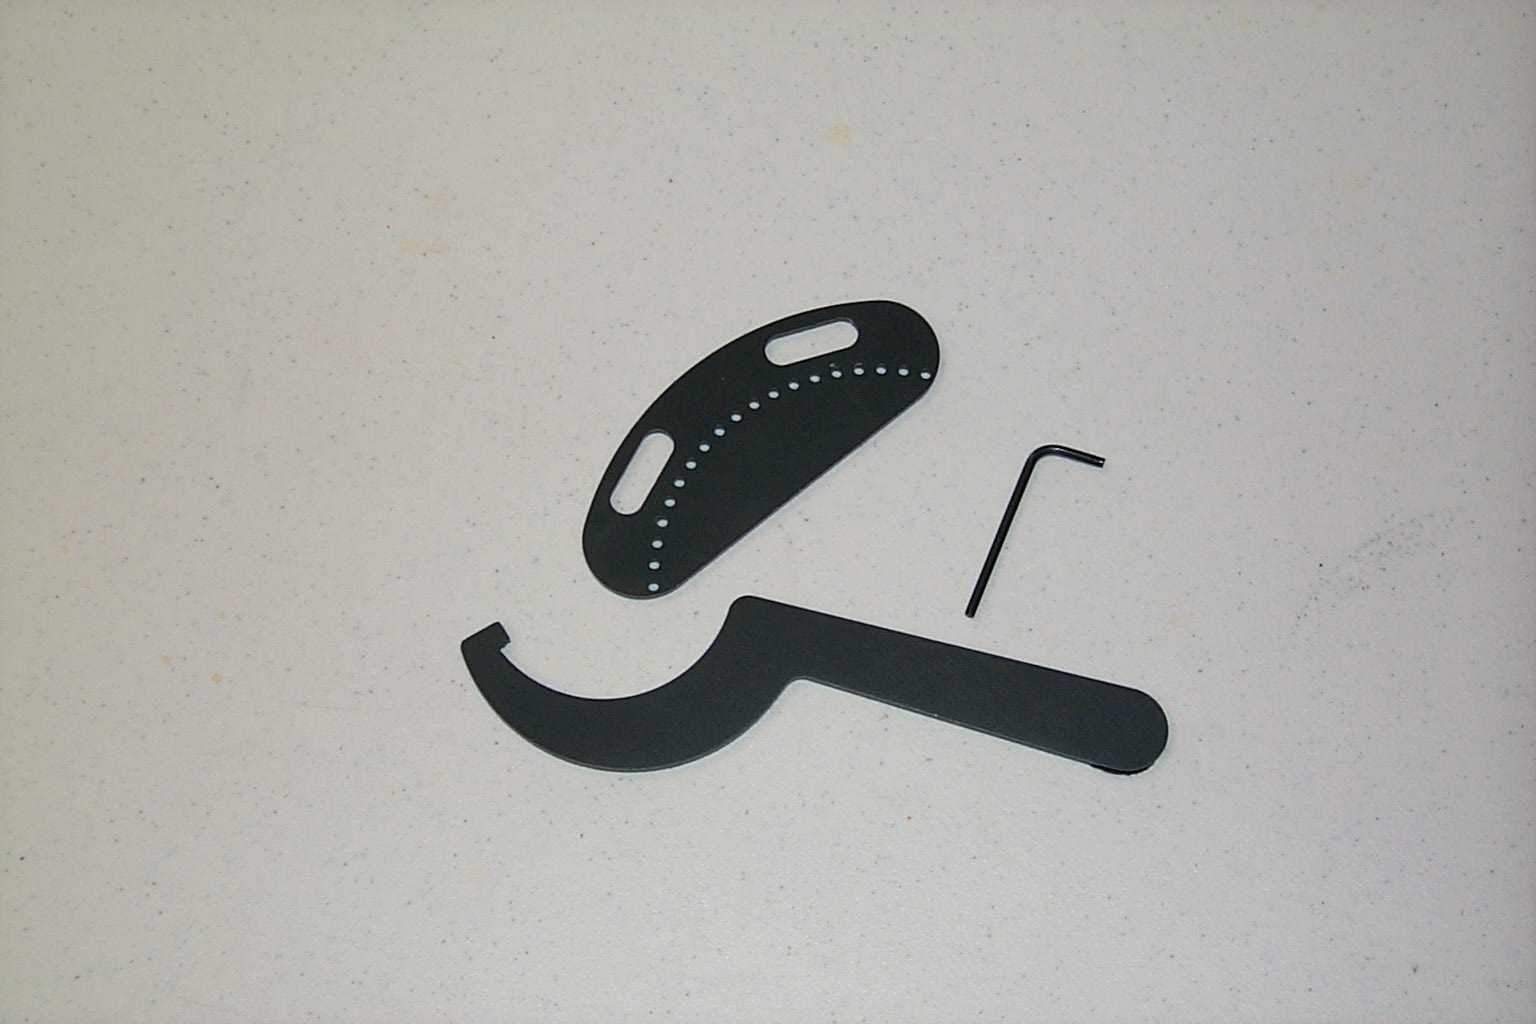
IMAGE 8 P0002385
The final two images 9 & 10 show the appropriate supplemental kit as applicable your particular vehicle.
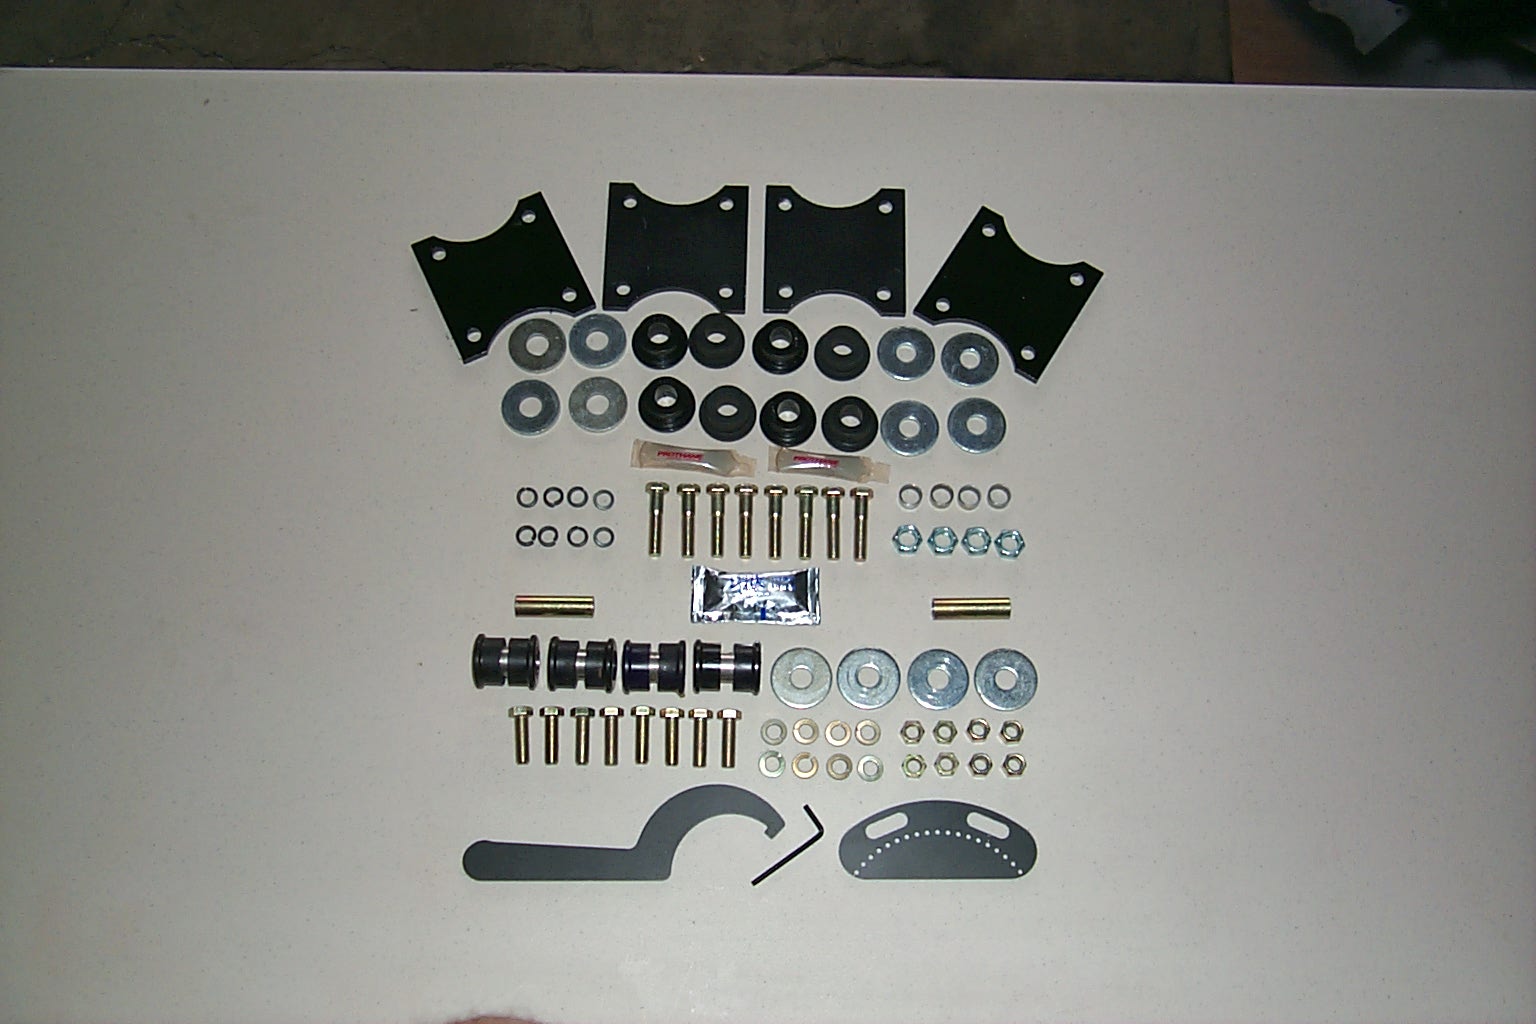 PART # COFSUHK/A
IMAGE 8 P0002406 (MGA 1500 1600 & 1622)
PART # COFSUHK/AB
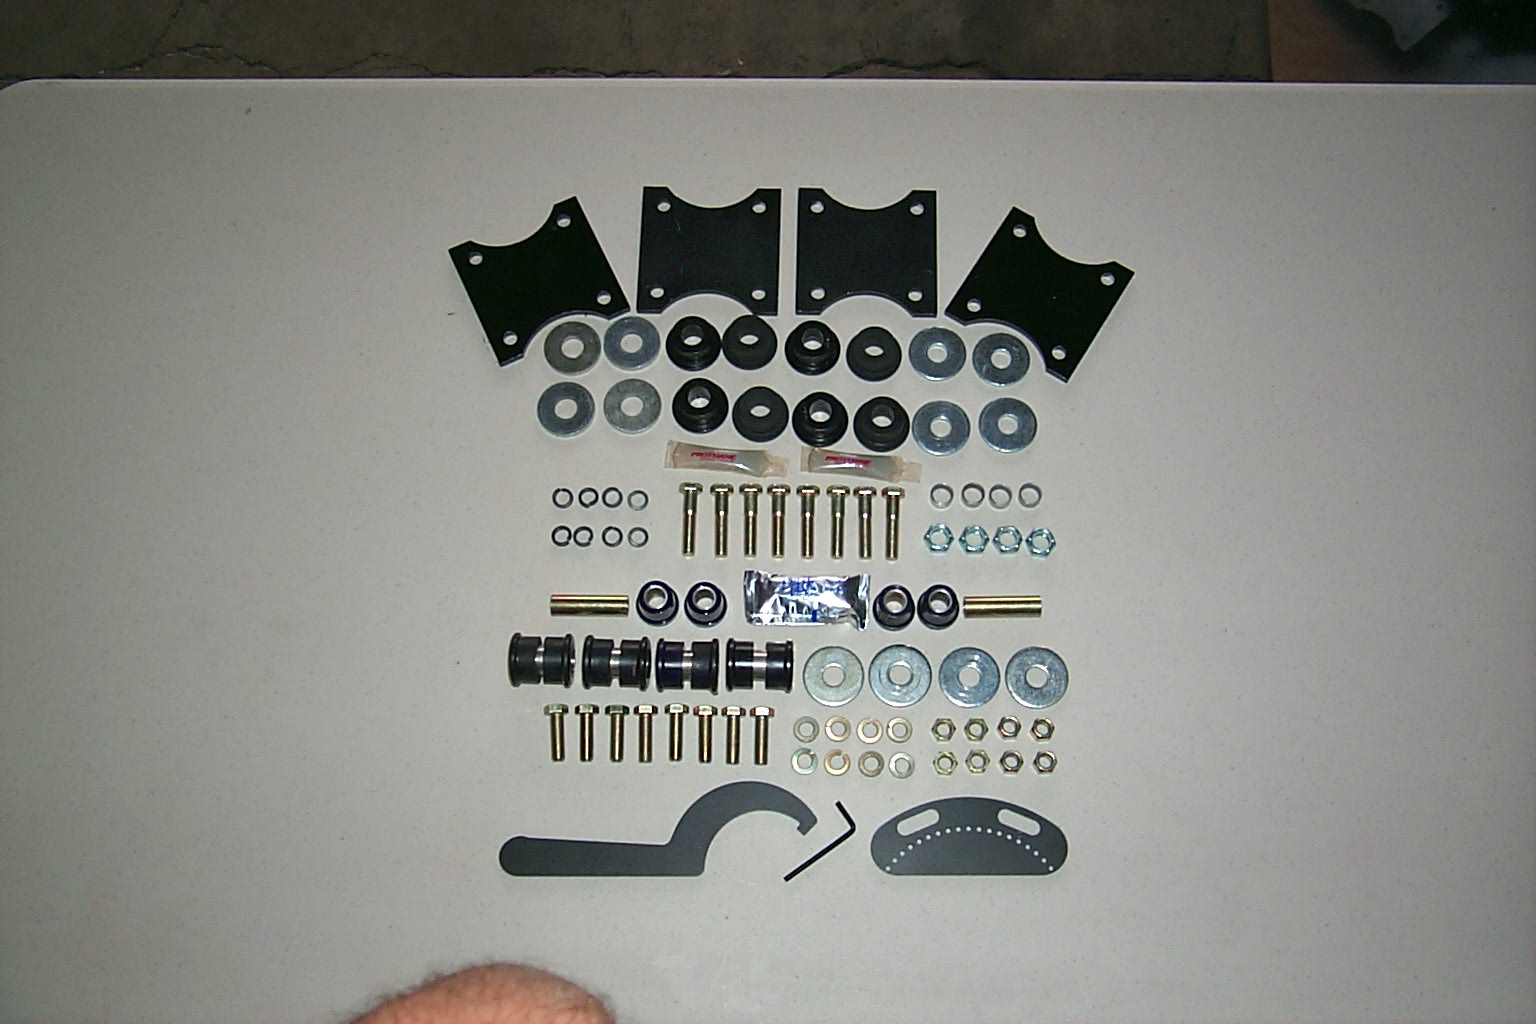 IMAGE 10 P0002405
(MGA 1500 1600 & 1622 WITH MGB STUB AXLE)
Contact British Automotive for further information regarding pricing structure and ordering procedures.